# Google Play publishing with codemagic.yaml
> How to deploy an app to Google Play using codemagic.yaml
Codemagic enables you to automatically publish your android application to Google Play.
>
> **Note:** This guide only applies to workflows configured with the **codemagic.yaml**. If your workflow is configured with **Flutter workflow editor** please go to [Publishing to Google Play using Flutter workflow editor](../publishing/publishing-to-google-play).
>
{{< youtube qrtk6e0BYjM >}}
Codemagic enables you to automatically publish your app either to one of the predefined tracks on Google Play or to your custom closed testing tracks.
In order to do so, a service account is required when setting up publishing to Google Play. The service account JSON key file must be added to Codemagic to authenticate with these services.
## Configure Google Play API access
1. To allow Codemagic to publish applications to Google Play, it is necessary to set up access using Google Play API.
2. In the Google Cloud Console, navigate to **Dashboard > IAM and Admin** and click **Create Service Account**.
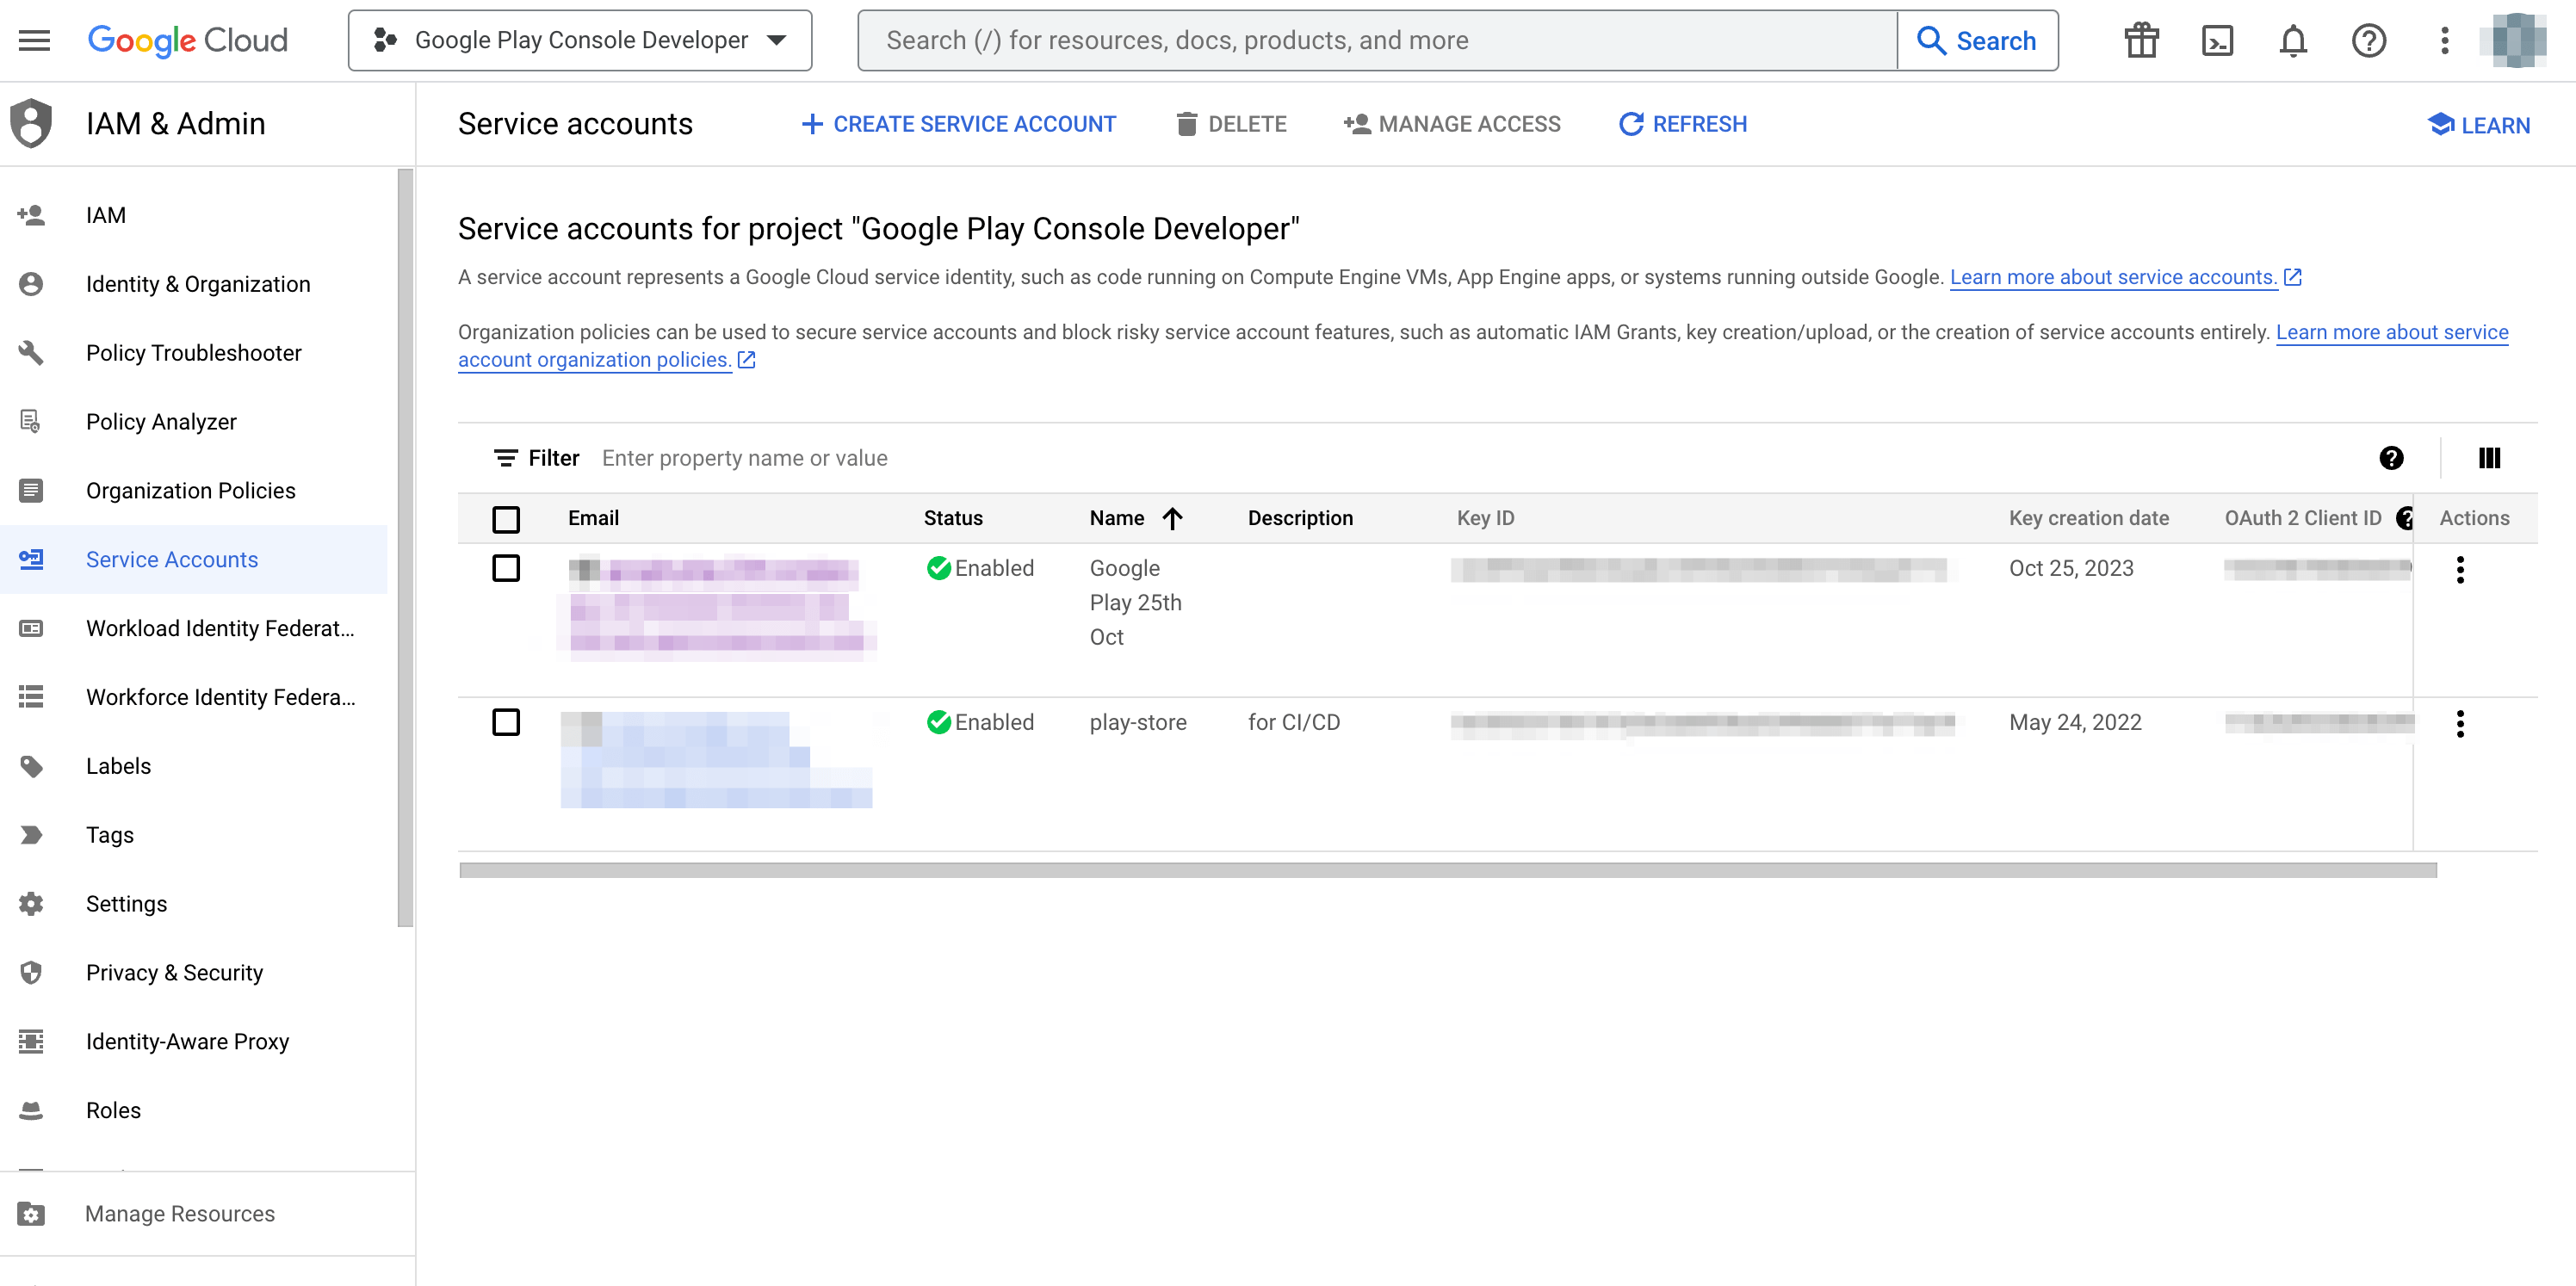
3. In step 1, fill in the **Service account details** and click **Create**. The name of the service account will allow you to identify it among other service accounts you may have created.
4. In step 2, click the **Select a role** dropdown menu and choose the role. In this example we will use **Service Account User** as the desired role. Start typing the name of the role that you wish to add.
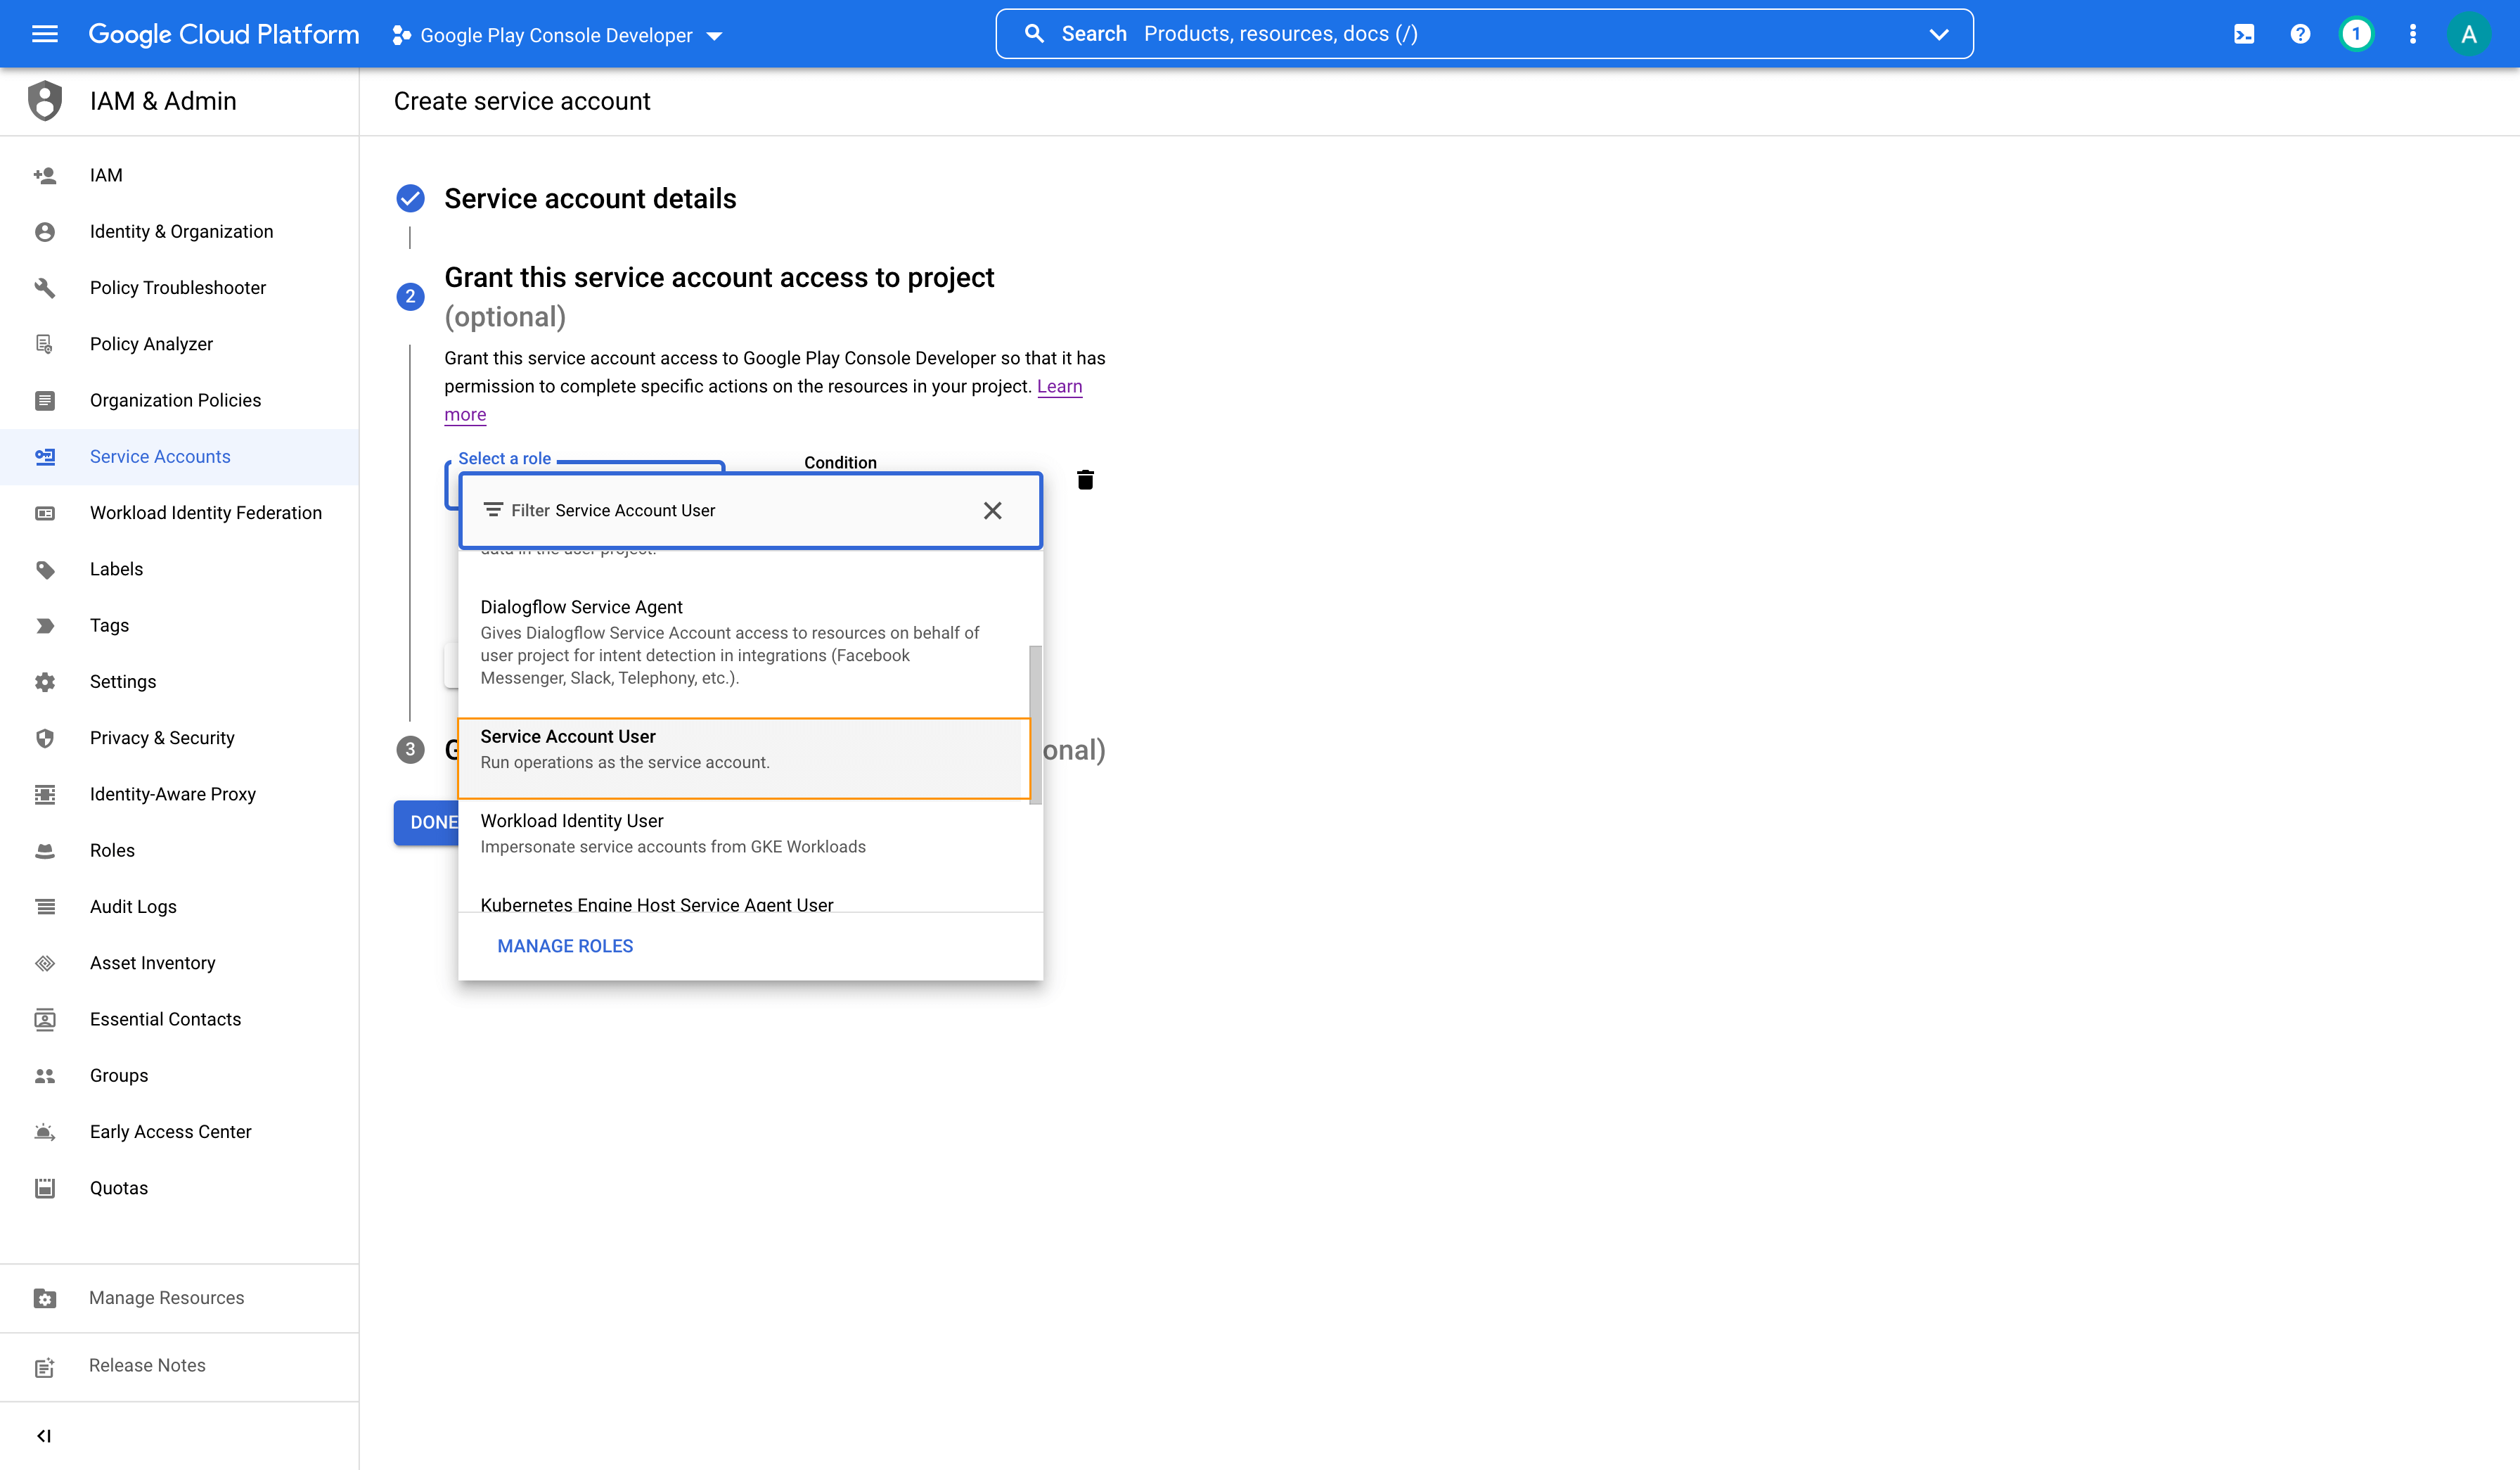
5. In step 3, you can leave the fields blank and click **Done**.
6. In the list of created service accounts, locate the account you just created. Copy its email address, which will be required later. Then, click on the menu in the **Actions** column, then click **Manage keys**.
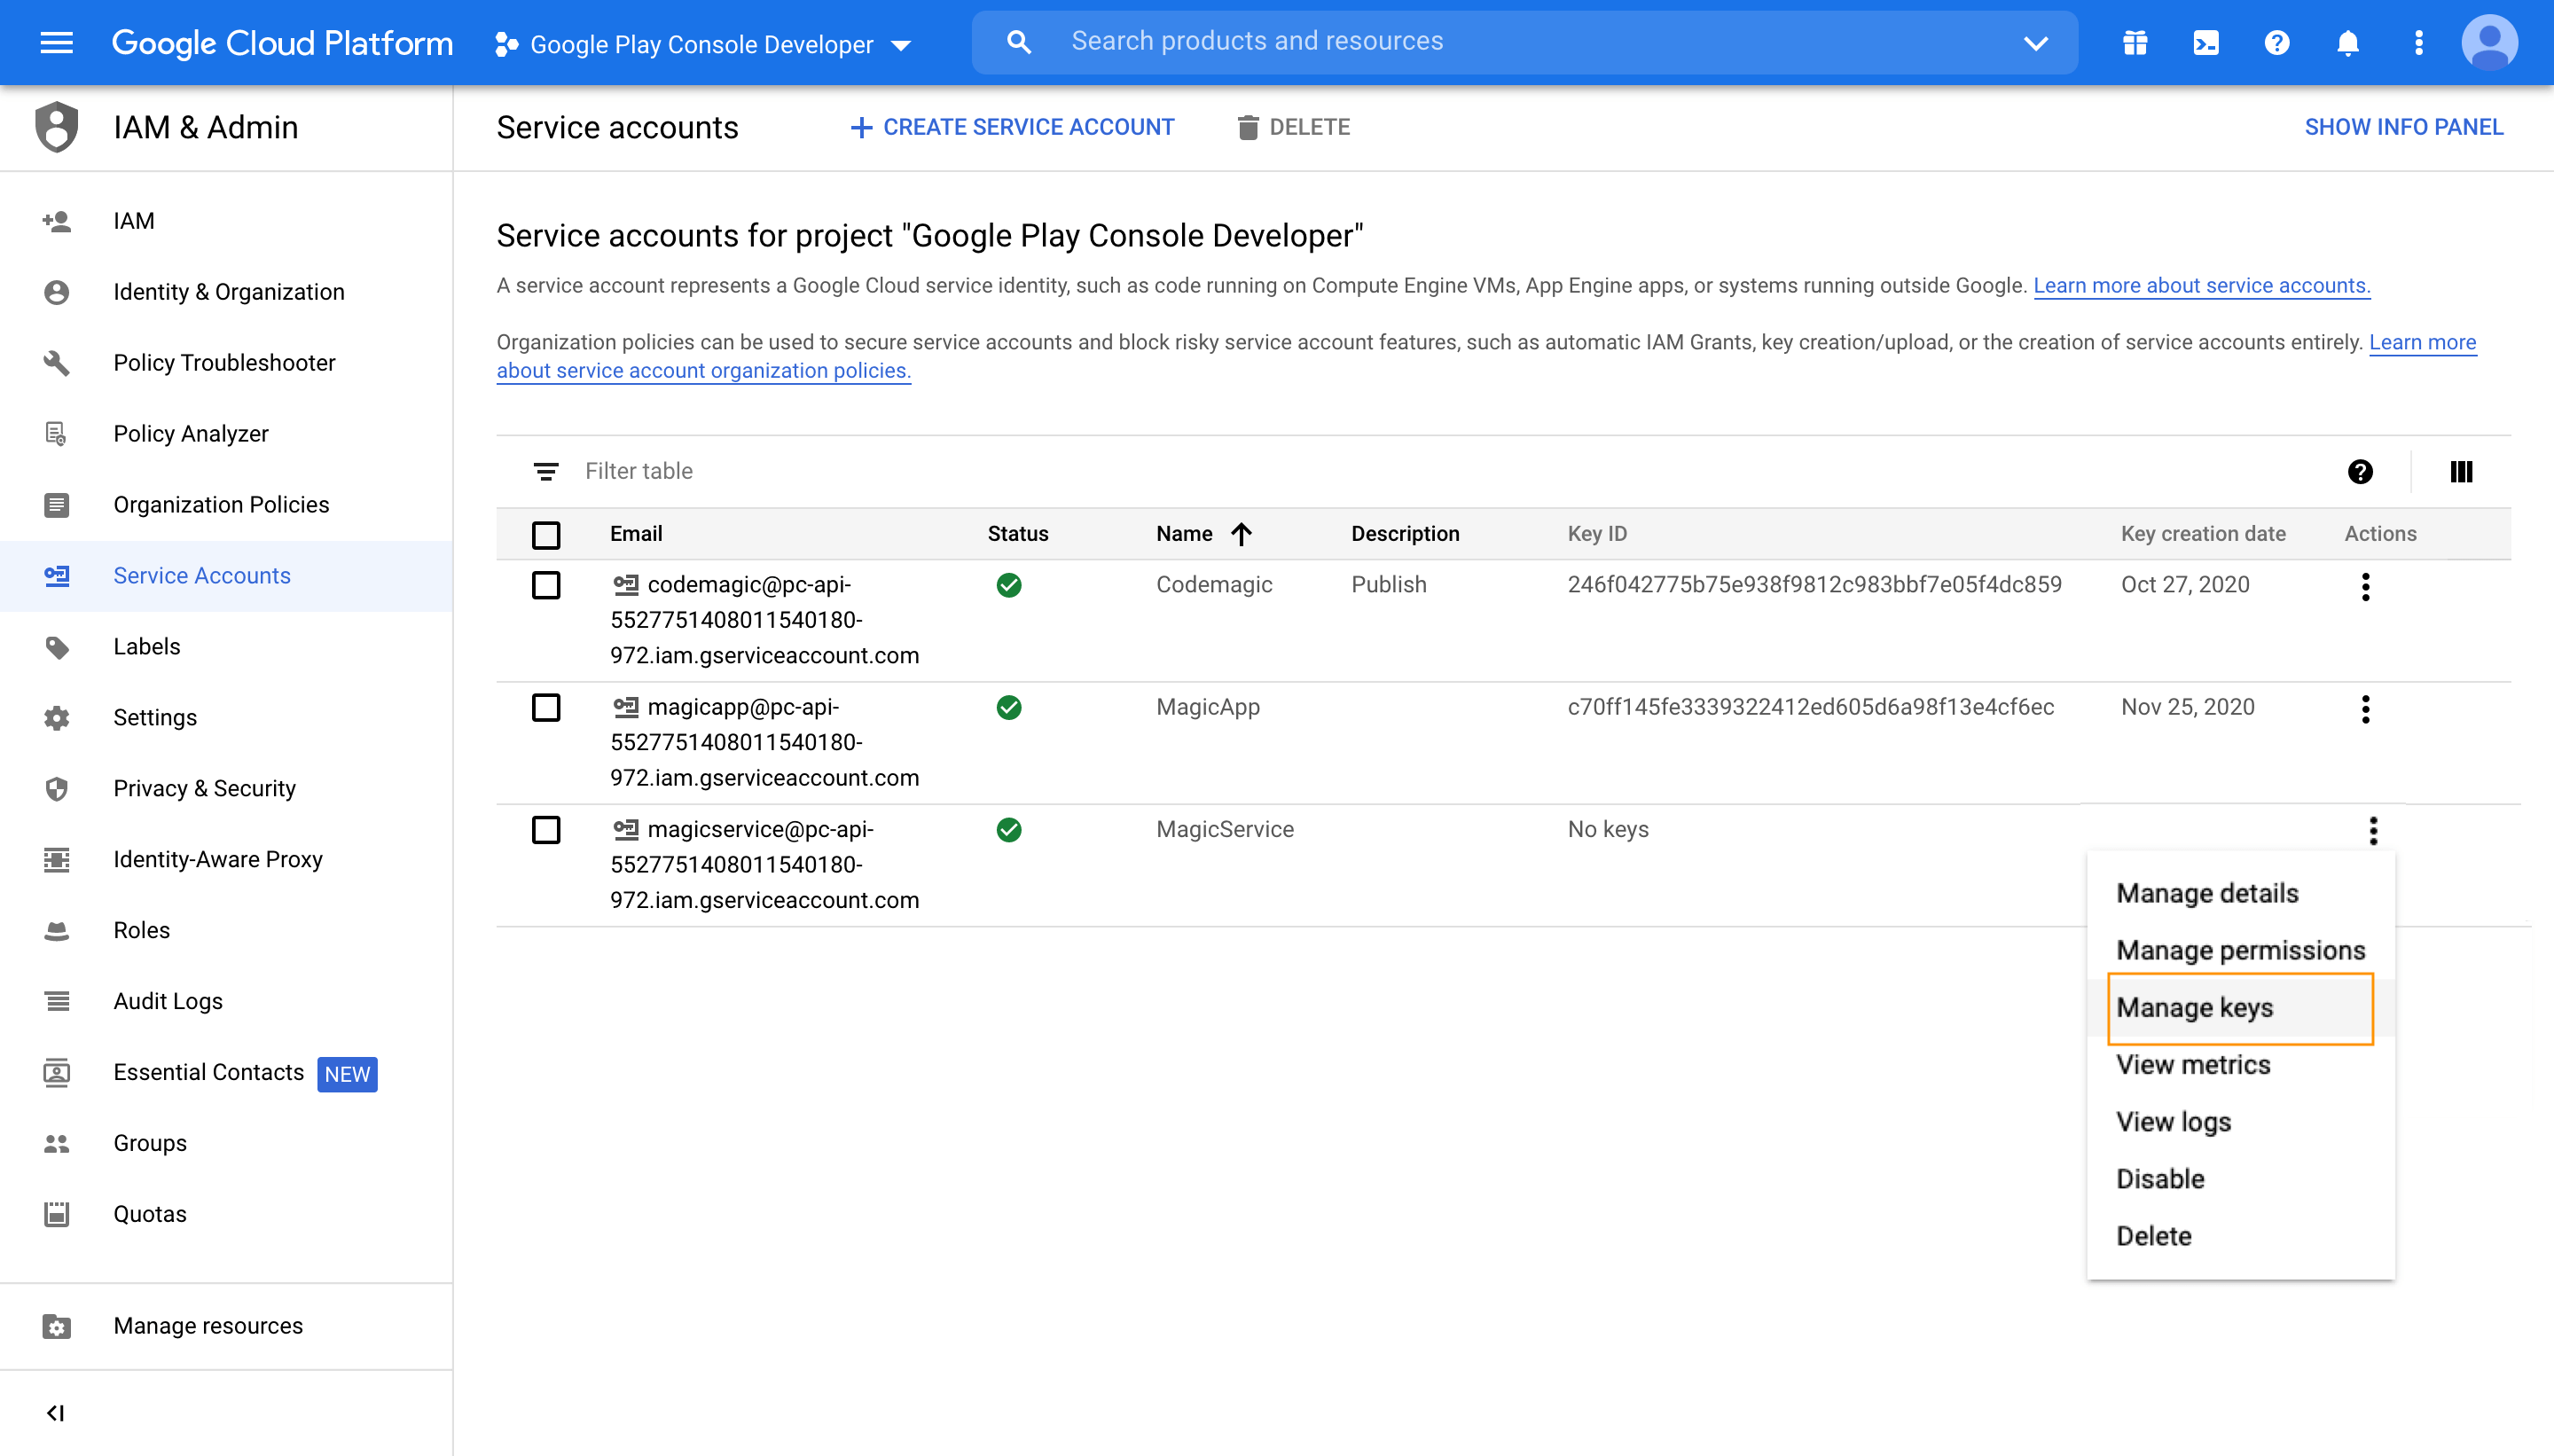
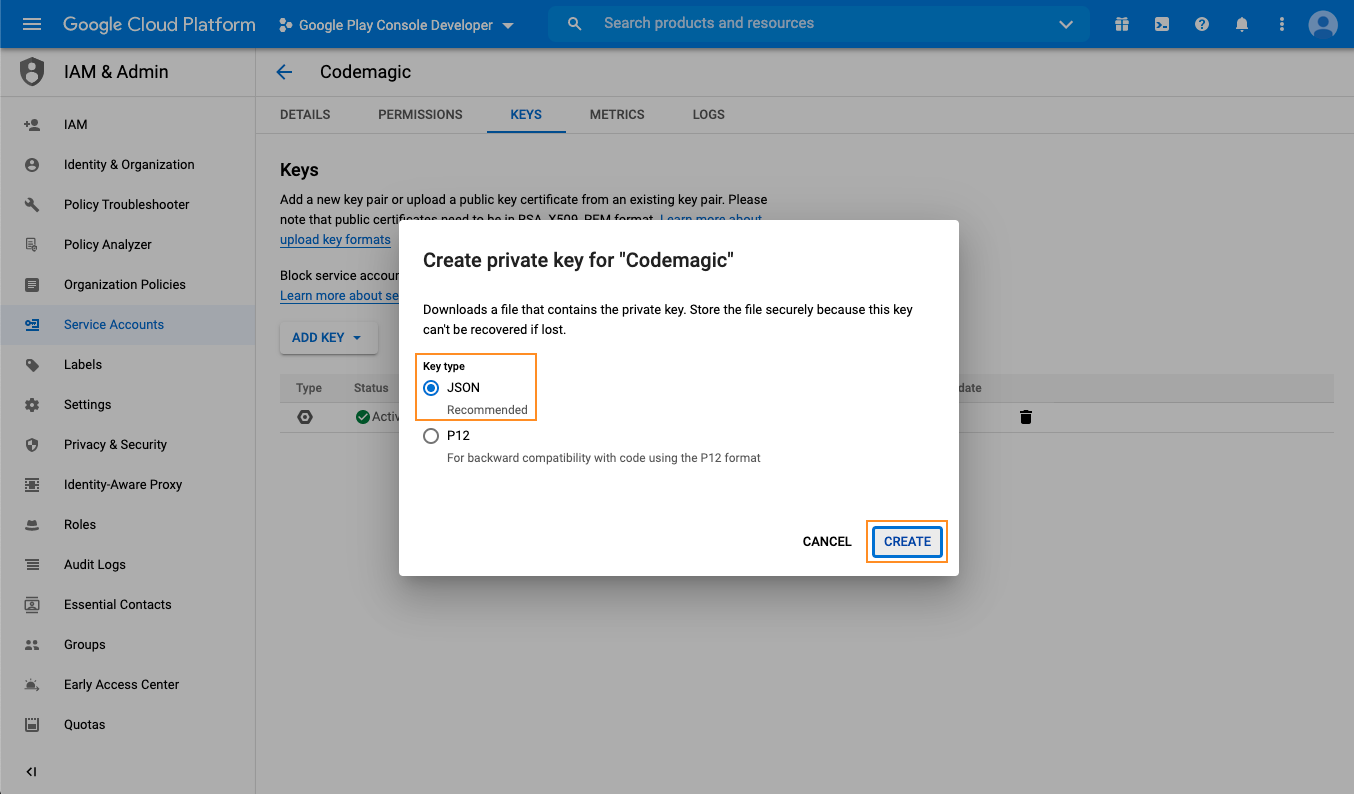
7. In the Keys section, click **Add Key > Create new key**. Make sure that the key type is set to `JSON` and click **Create**. Save the key file in a secure location to have it available.
8. Back in **Google Play Console**, navigate to **Users and Permissions** and click **Invite new users**. Enter the email id which you copied in step 6.
9. Navigate to **Users and Permissions**. Click on the invited user and go to **App Permissions**. Add the desired applications to grant access.
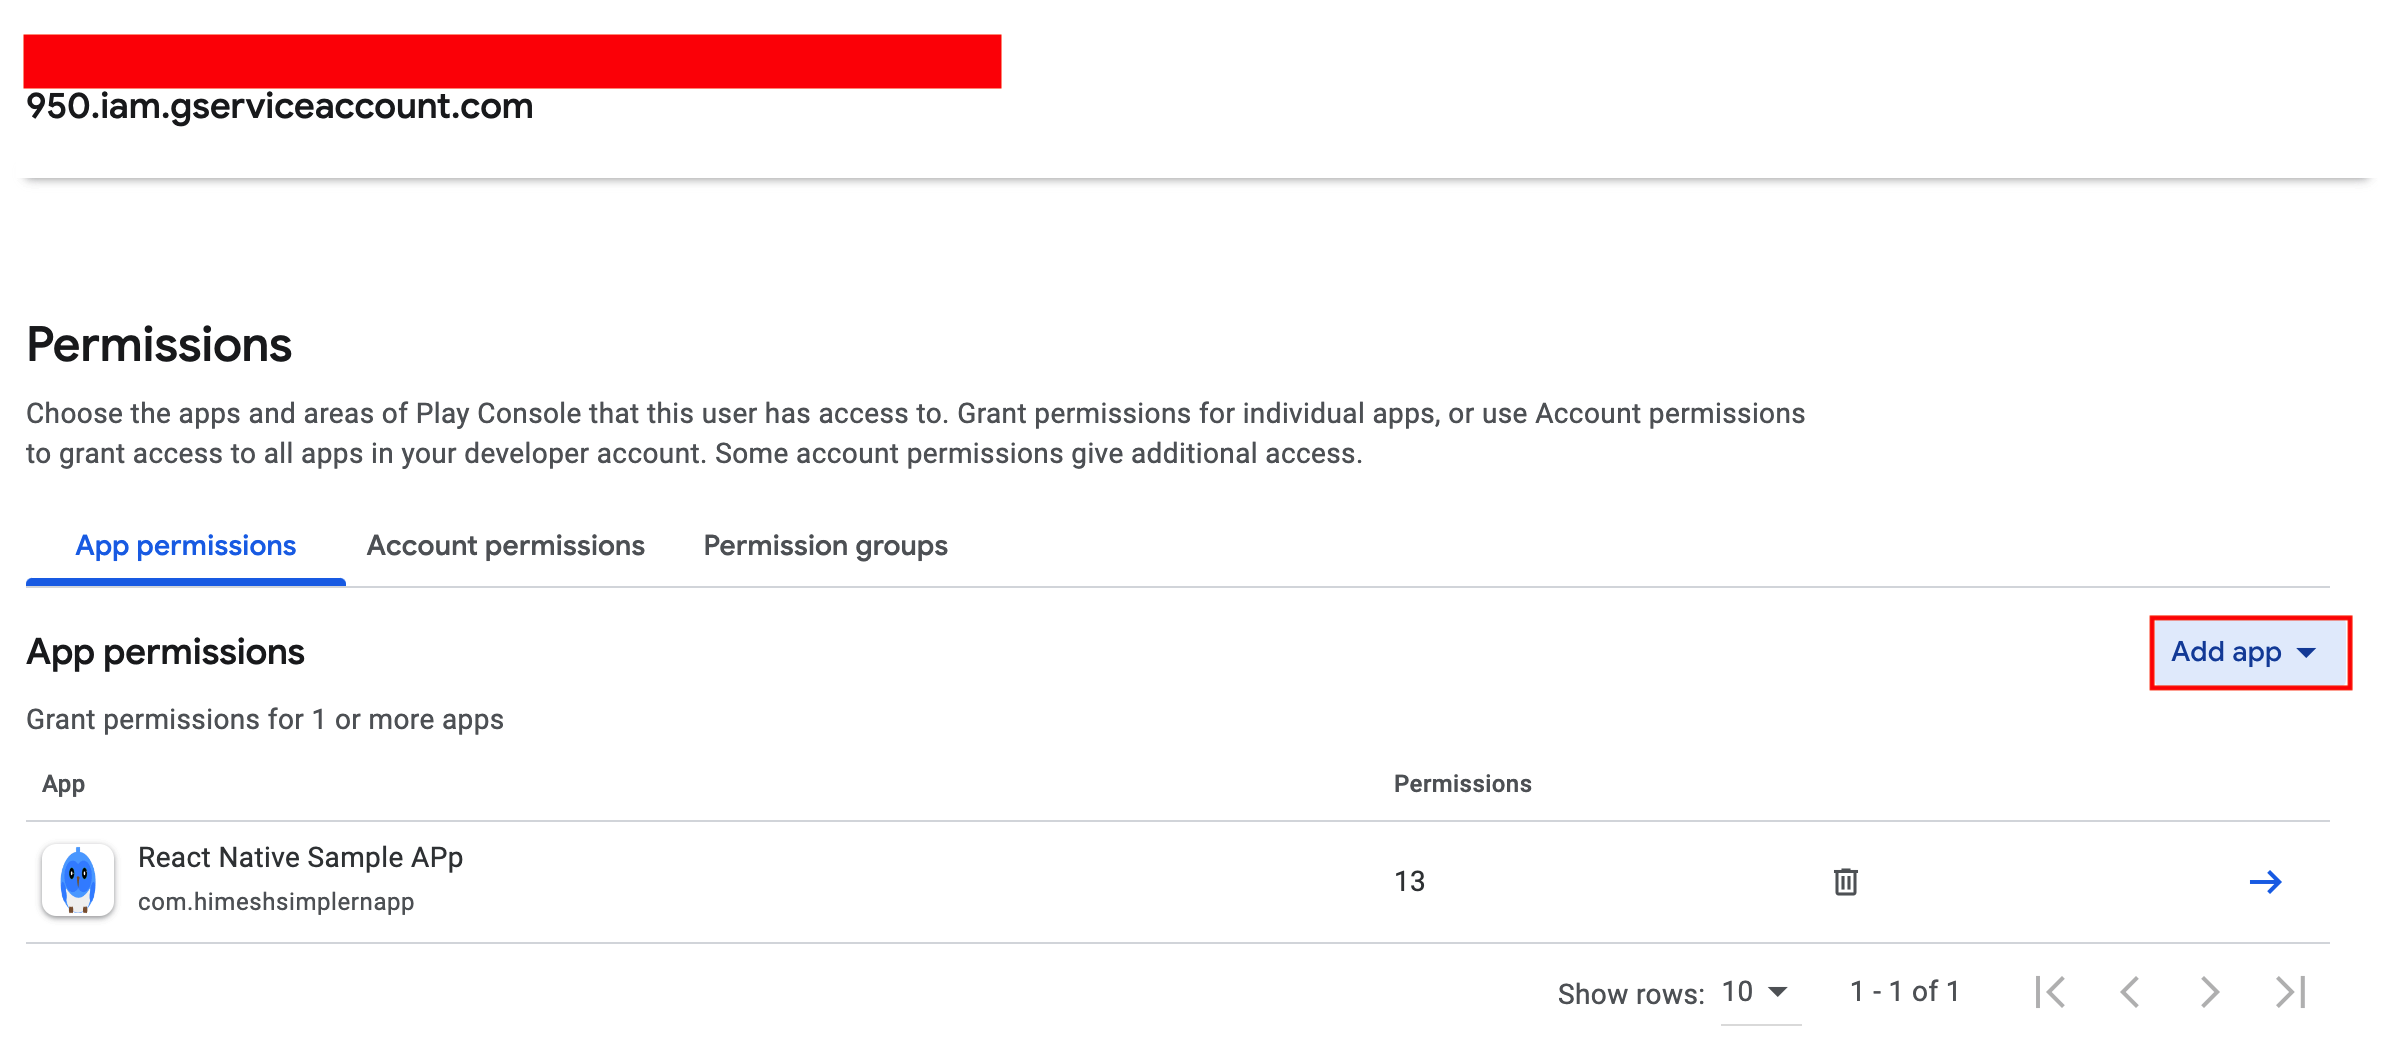
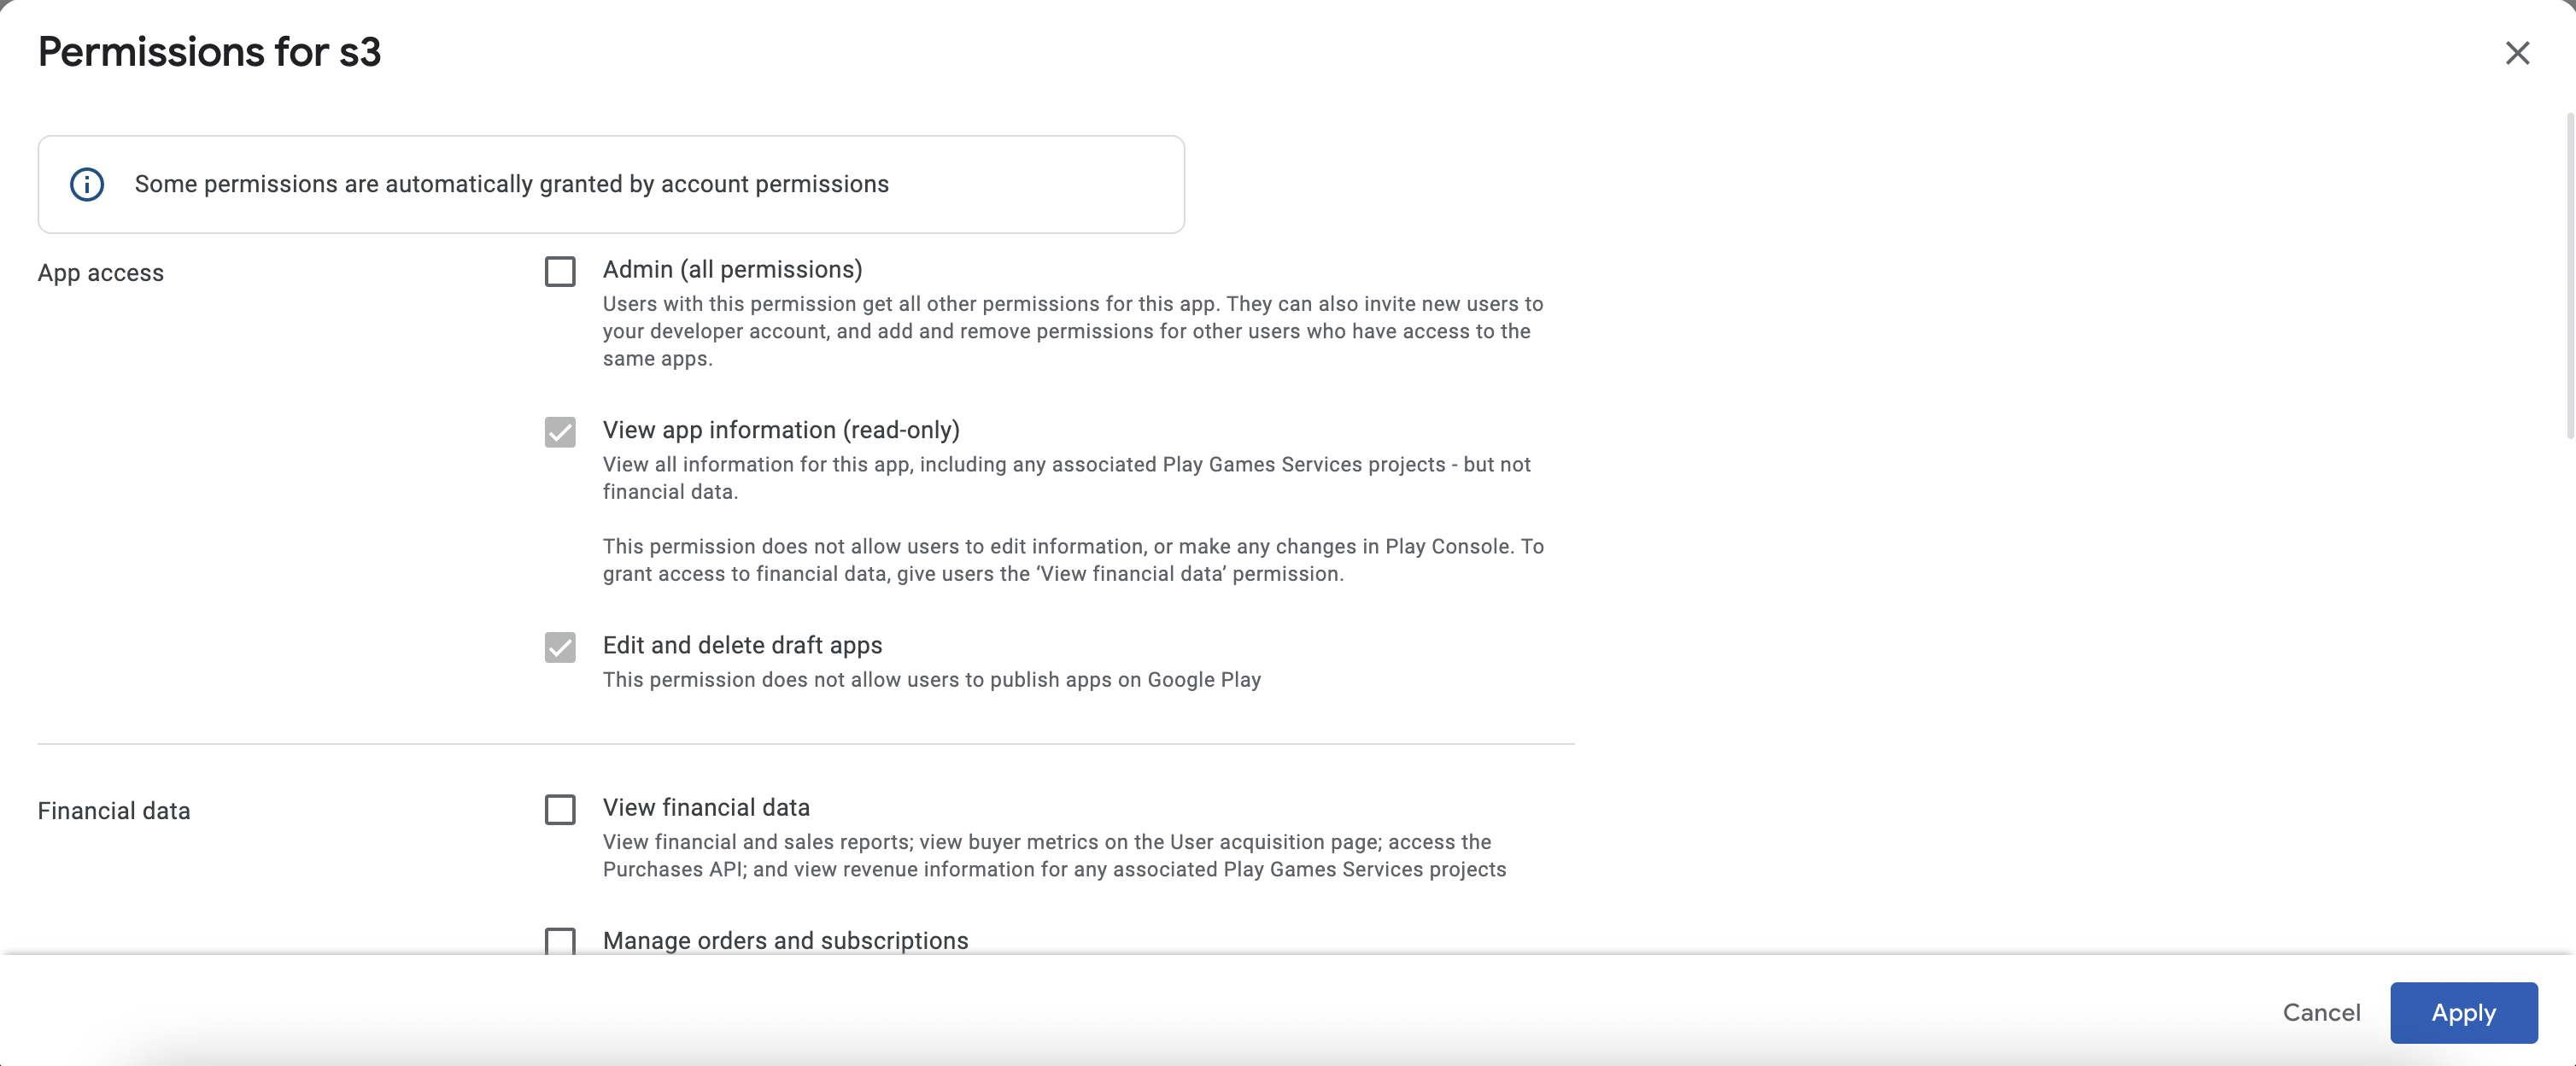
10. Ensure that you check the Releases section. You can leave the rest of the settings as default and click **Apply** (financial data permissions can be left blank).
11. On the **Account permissions** tab, leave everything as it is. (There is NO need to grant the service account **Admin** access).
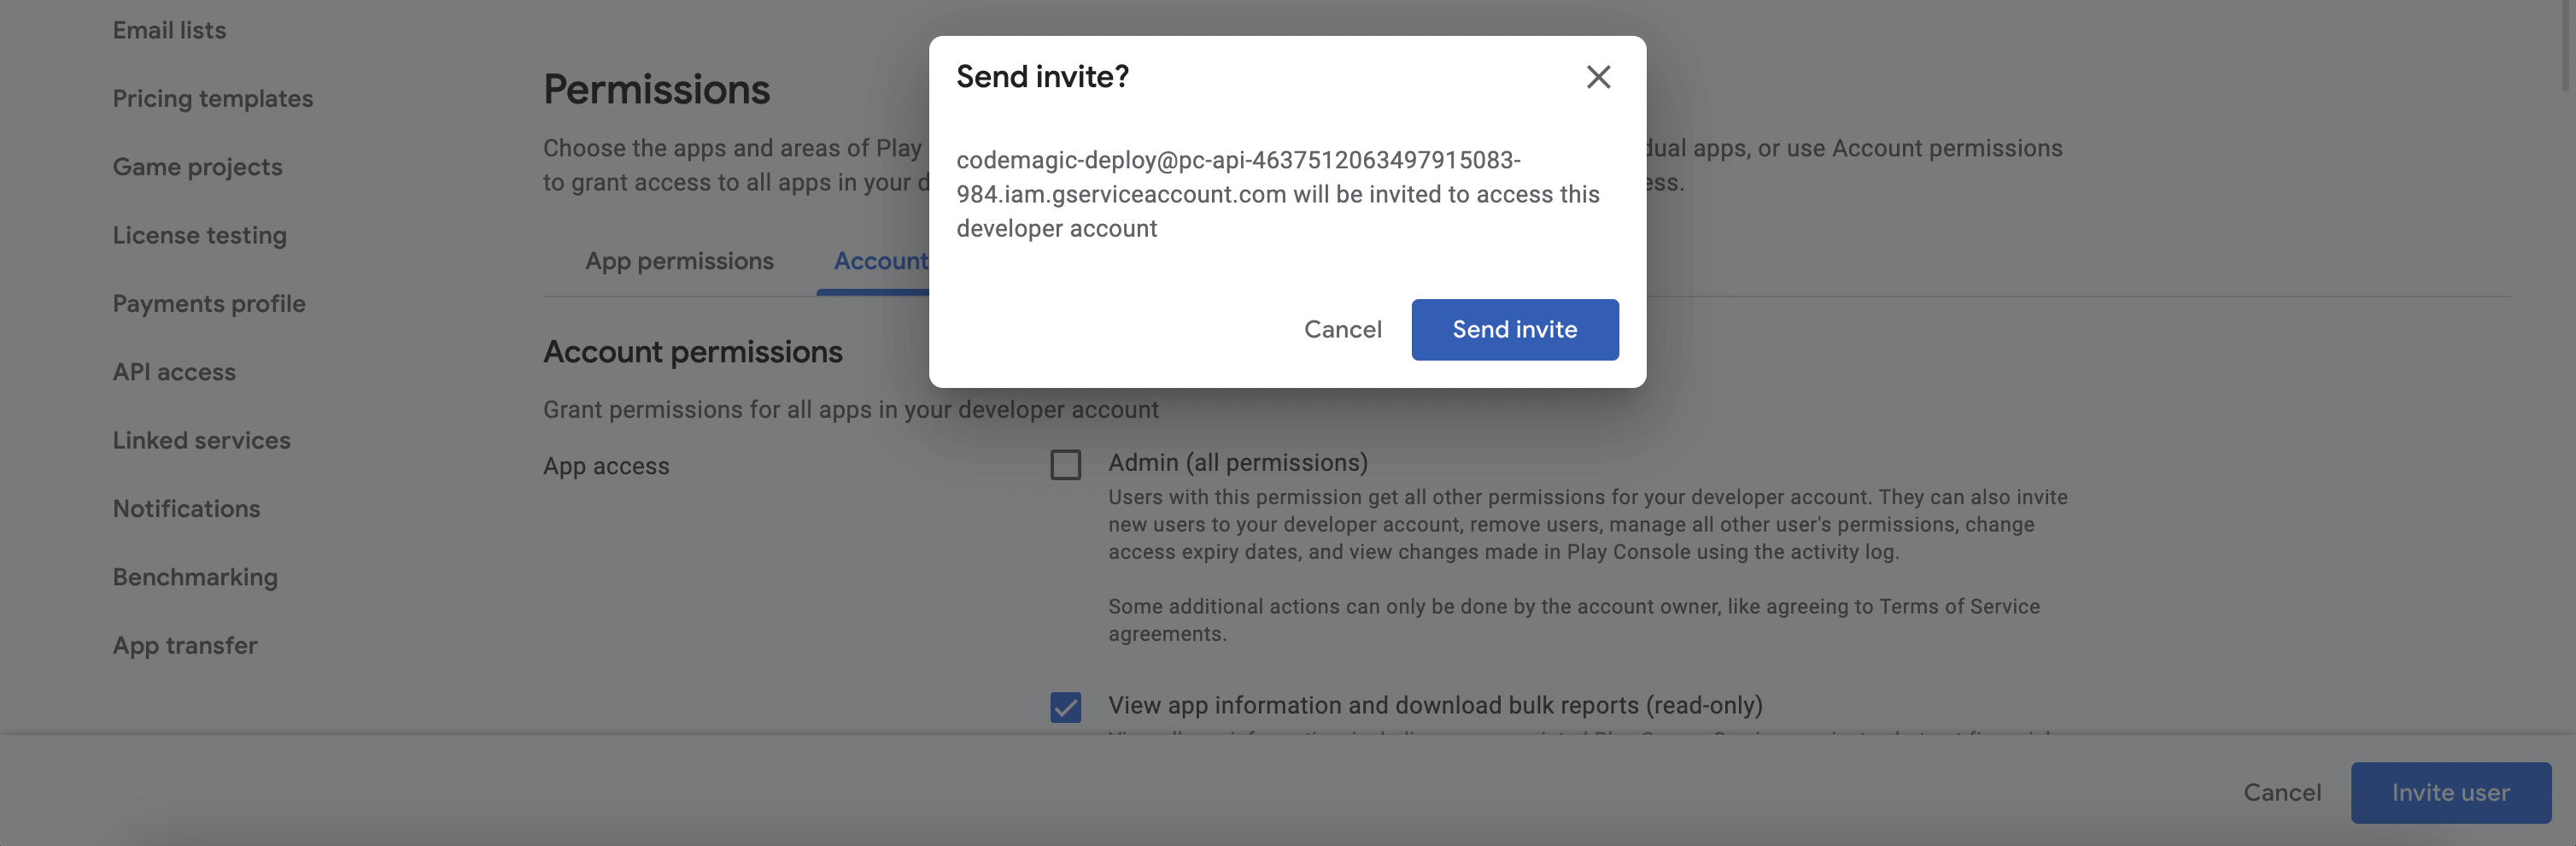
12. Finally, click **Invite user** to finish setting up the service account on Google Play. In the Invite user window, the Email address field is pre-filled. Under Permissions, the default ones are already selected. You can go with these. Click Invite user at the bottom of the page.
## Preparing your first release
⚠️ Important: The very first version of your app must be uploaded to Google Play manually.
1. Run your Codemagic workflow to produce an `app-release.aab`. Make sure to [configure Android code signing](../yaml-code-signing/signing-android/) so the app is properly signed before uploading.
2. Download the generated `app-release.aab` binary from the build artifacts section.
3. Go to your Google Play Console, create your application entry (if it doesn’t exist yet), and manually upload this .aab in Production 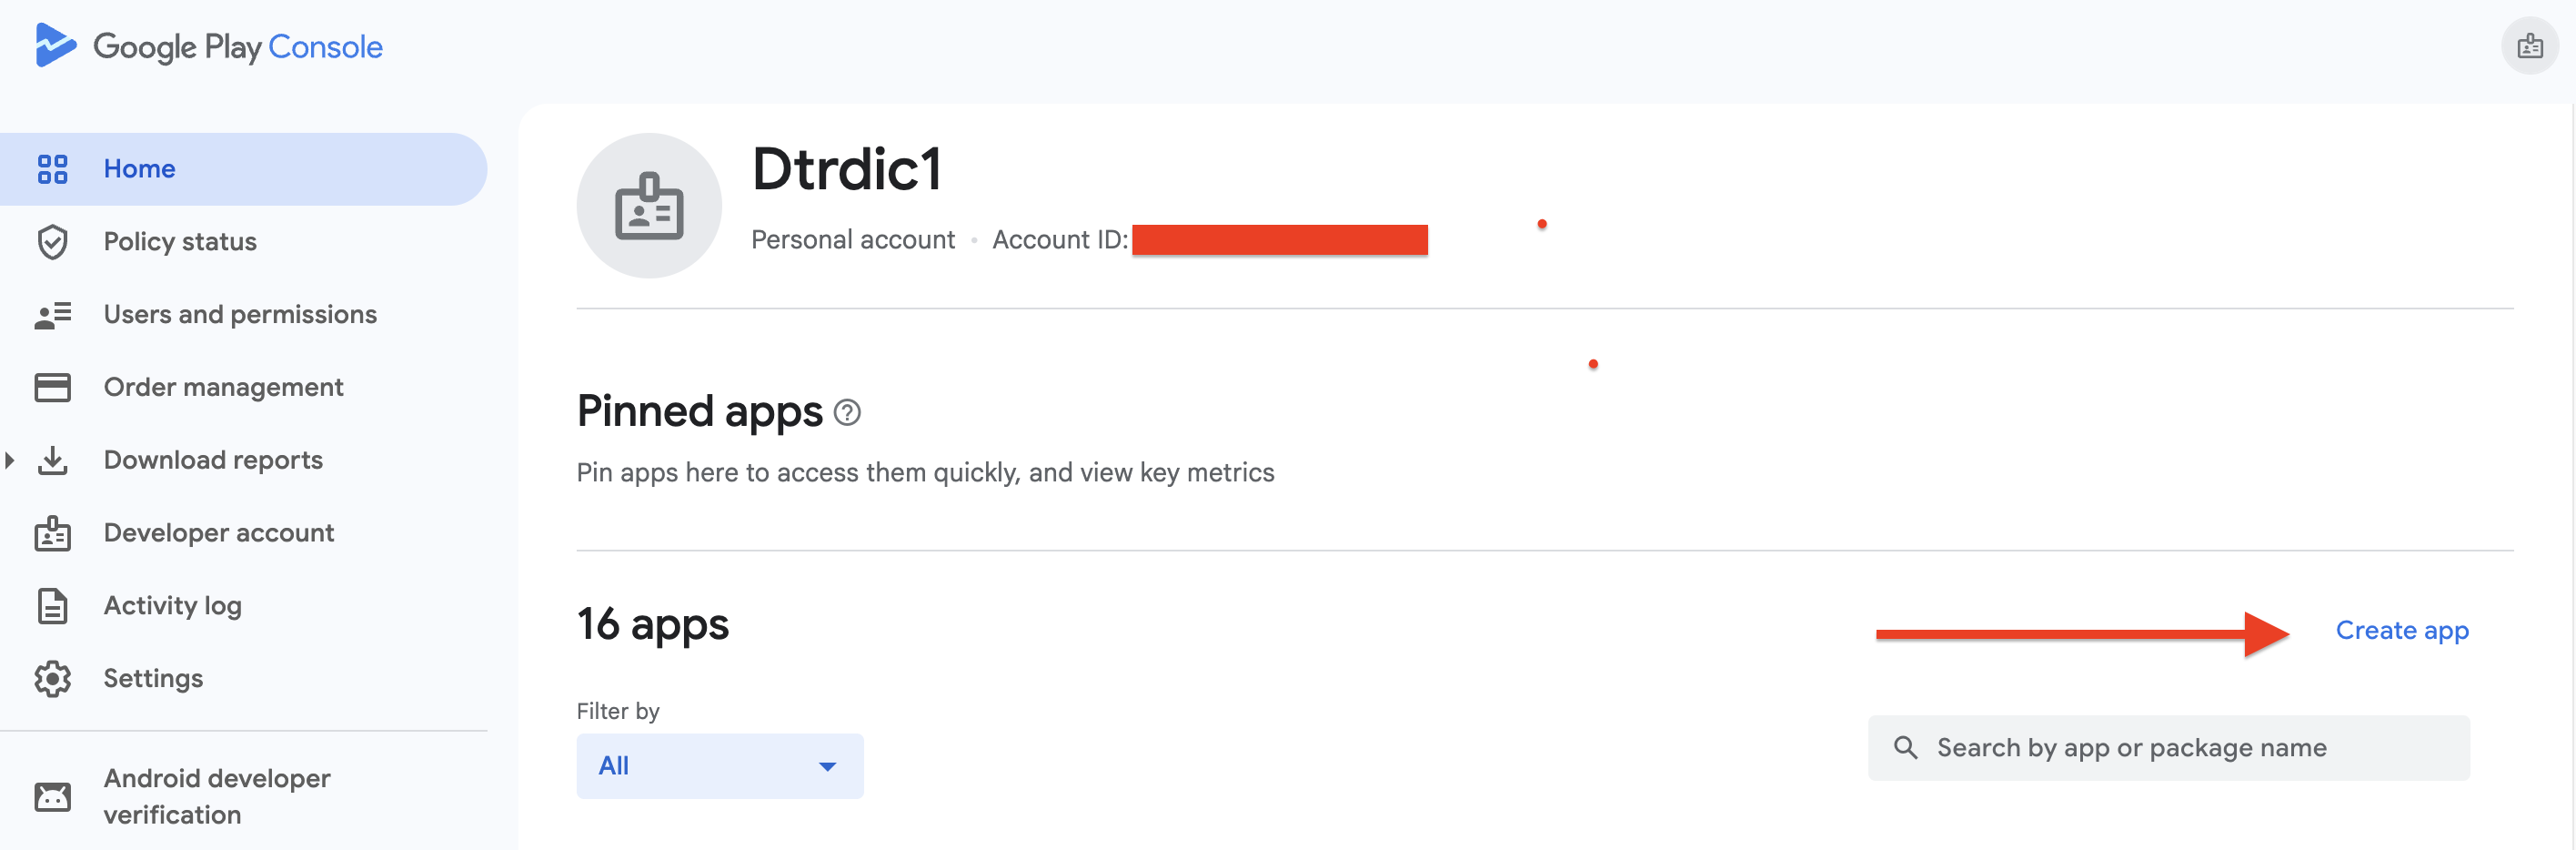
4. Create new release (or the track you want to start with).
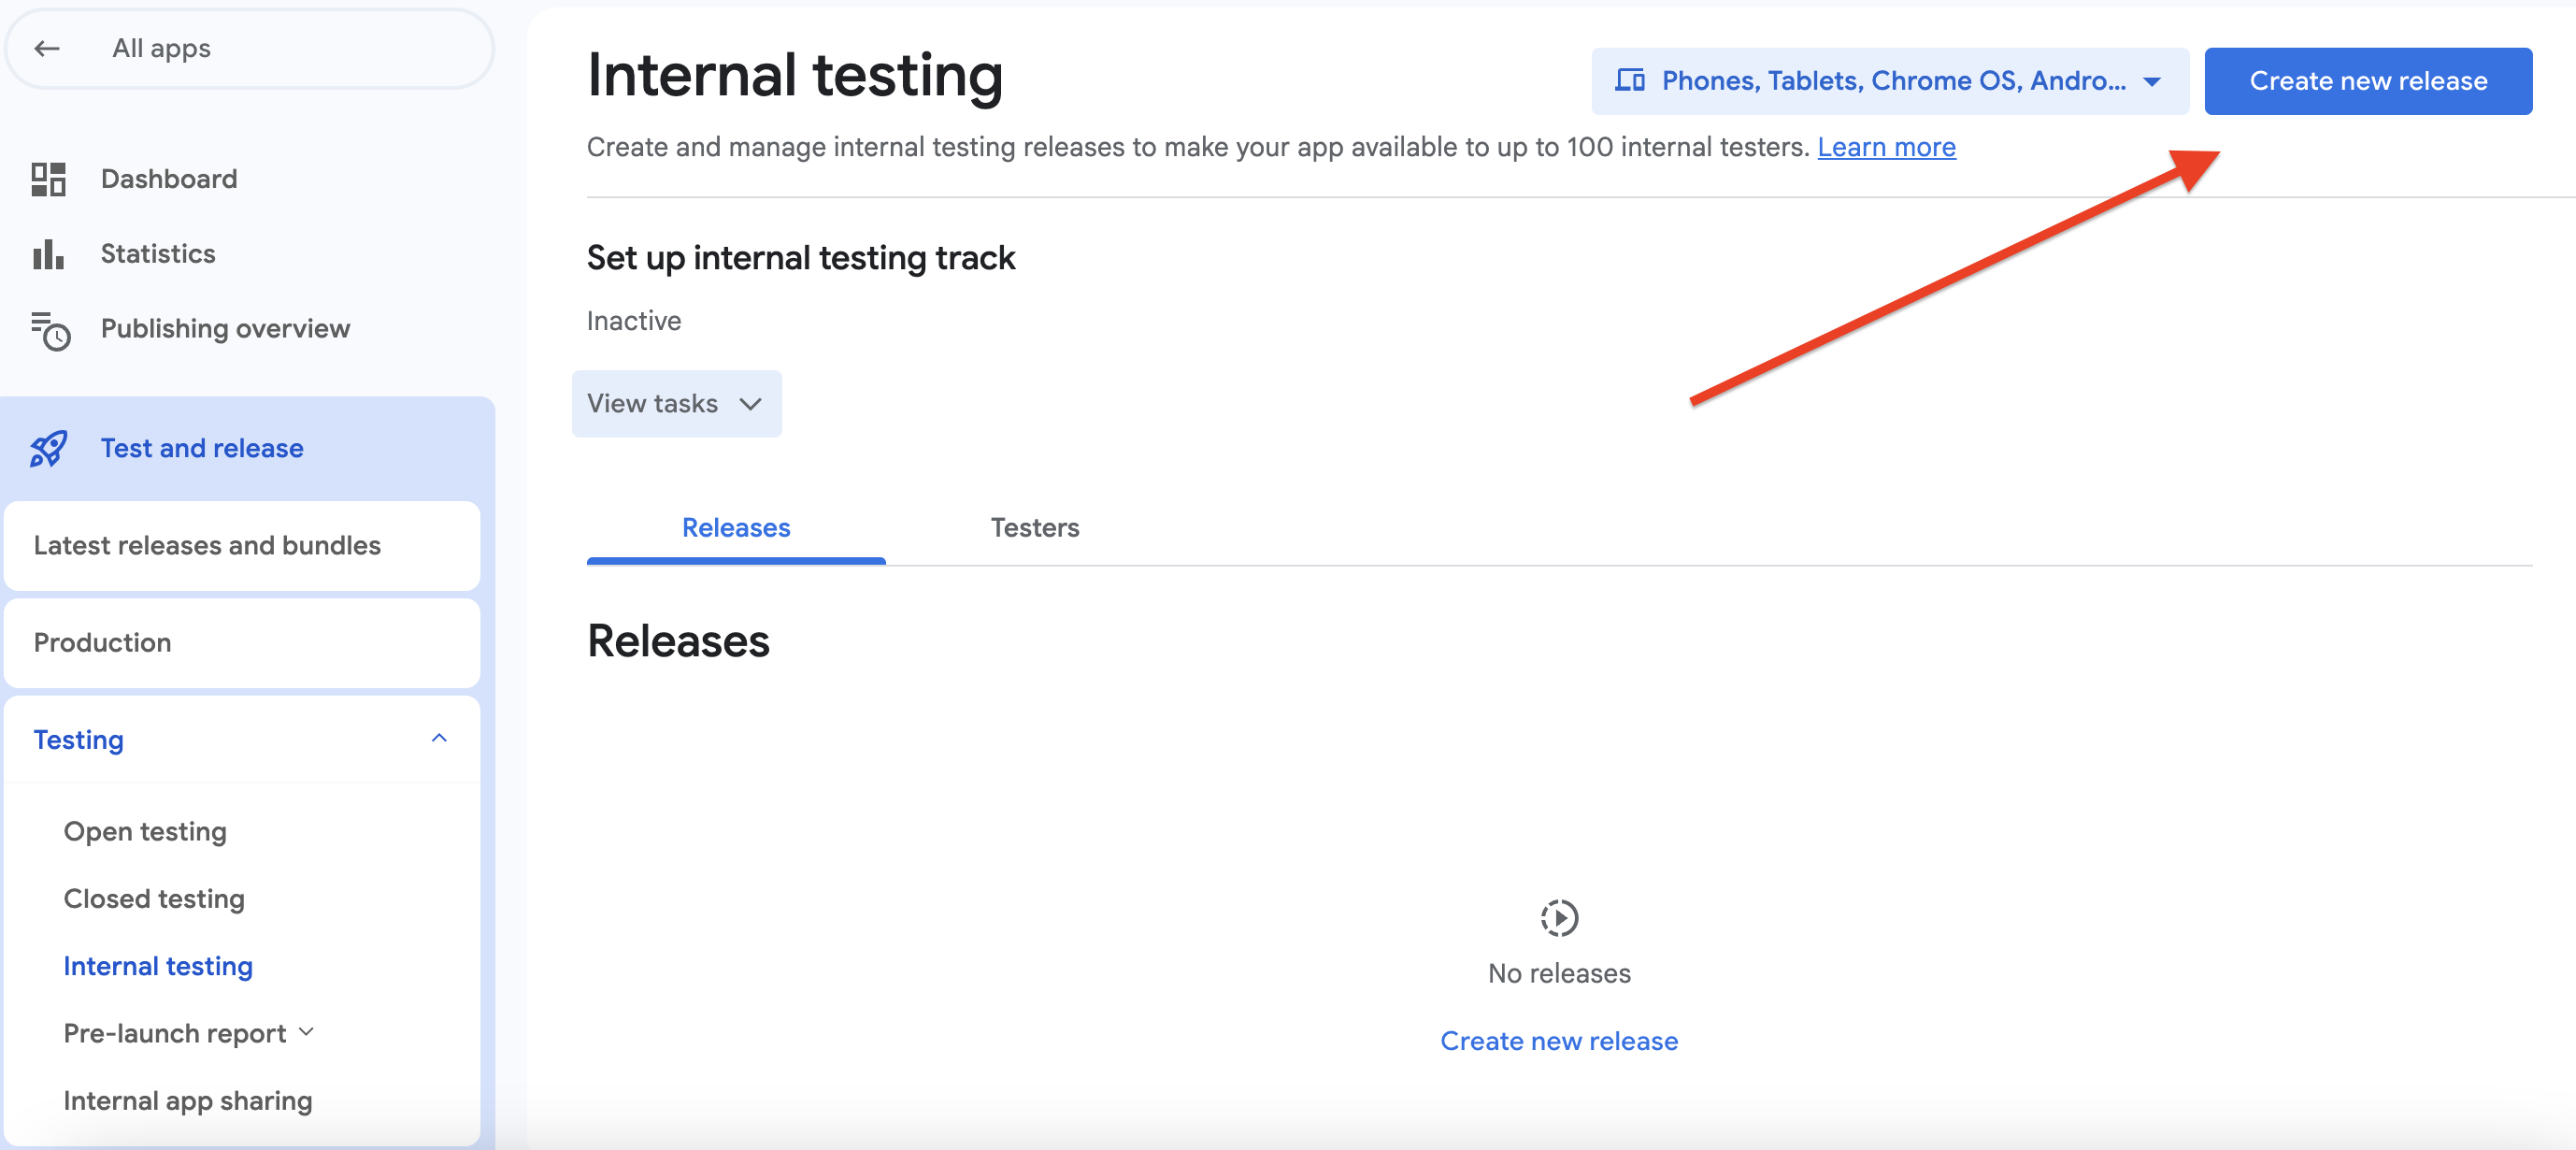
5. Complete the required app setup steps (app details, screenshots, content rating, etc.) and roll out your release.
After this first manual upload, Codemagic can automatically publish subsequent versions to the track(s) you configured in your codemagic.yaml.
Also remember: each new build uploaded to Google Play must have a higher version code than the previously uploaded one. You can automate [incrementing the build versions](../building/build-versioning/ 'Build versioning') in your Codemagic workflows.
## Configure publishing in codemagic.yaml
Once you make all the preparations as described above and configure publishing to Google Play, Codemagic will automatically distribute the app to Google Play every time you build the workflow.
1. Save the contents of the `JSON` key file as a [secret environment variable](../variables/environment-variable-groups/#storing-sensitive-valuesfiles) in application or team settings:
1. Open your Codemagic app settings, and go to the **Environment variables** tab.
2. Enter the desired **_Variable name_**, e.g. `GOOGLE_PLAY_SERVICE_ACCOUNT_CREDENTIALS`.
3. Copy and paste the key file content as **_Variable value_**.
4. Enter the variable group name, e.g. **_google_credentials_**. Click the button to create the group.
5. Make sure the **Secret** option is selected.
6. Click the **Add** button to add the variable.
7. Add the variable group to your `codemagic.yaml` file
```yaml
environment:
groups:
- google_credentials
```
2. Configure publishing section in `codemagic.yaml` to publish to Google Play:
```yaml
publishing:
google_play:
# Contents of the JSON key file for Google Play service account saved
# as a secret environment variable
credentials: $GOOGLE_PLAY_SERVICE_ACCOUNT_CREDENTIALS
# Name of the track internal, alpha, beta, production, internal app sharing,
# or your custom track name
track: internal
# Optional string. The release name.
# Not required to be unique. If not set, the name is generated from the APK's versionName.
release_name: Custom release name
# Optional Priority of the release (only set if in-app updates are supported)
# integer in range [0, 5]
in_app_update_priority: 3
# Optional. Rollout fraction (set only if releasing to a fraction of users)
# value between (0, 1)
rollout_fraction: 0.25
# Optional boolean To be used ONLY if your app cannot be sent for review automatically *
changes_not_sent_for_review: true
# Optional boolean. Publish artifacts under a draft release.
# Can not be used together with rollout_fraction. Defaults to false
submit_as_draft: true
# Optional. Enable release to be promoted to another track in addition to where it is
# originally published.
release_promotion:
# Name of the track to which release is promoted.
track: alpha
# Optional. Rollout fraction (set only if releasing to a fraction of users)
# value between (0, 1)
rollout_fraction: 0.25
# Optional boolean. Promote the release as draft.
# Can not be used together with rollout_fraction. Defaults to false
promote_as_draft: true
```
3. Codemagic enables you to automatically publish your app to one of the tracks:
- **Internal** --- publish for internal testing and QA
- **Alpha** --- publish for testing with a small group of trusted users
- **Beta** --- publish for testing to a wider set of users
- **Production** --- release the app to production
- **Custom** --- release the app to a custom closed testing track
In order to publish to a track (e.g. `internal`) and immediately promote the same release to another track (e.g. `alpha`) to reach a wider audience, additionally configure the `release_promotion` section.
>
> **Note:** You can use the "**Wear OS Only**" track to manage Wear OS releases in Play Console.
> To target "**Wear OS Only**" track, add **wear:** in the track name.
>
> `track: wear:internal`
>
4. If your application supports [in-app updates](https://developer.android.com/guide/playcore/in-app-updates), Codemagic allows setting the update priority. Otherwise, `in_app_update_priority` can be omitted or set to `0`.
5. In addition, Codemagic supports [staged releases](https://support.google.com/googleplay/android-developer/answer/6346149?hl=en), allowing users to choose which fraction of the testers or users get access to the application. To release to everyone, omit `rollout_fraction` from codemagic.yaml.
>
> **Tip:** You can override the publishing track specified in the configuration file using the environment variable `GOOGLE_PLAY_TRACK`. This is useful if you're starting your builds via [Codemagic API](../rest-api/overview/) and want to build different configurations without editing the configuration file.
>
>
> **Note:** To use different Google Play Console accounts for publishing your Android apps, set up separate workflows.
>