Adding apps to Codemagic
How to add an app to Codemagic
Connecting a Git repository
Adding applications to Codemagic is a simple and straightforward process of connecting your Git repository and selecting the repository root for the application.
For the best integration with the Git provider, it’s recommended to connect your GitHub repositories using the repository integration built in to Codemagic.
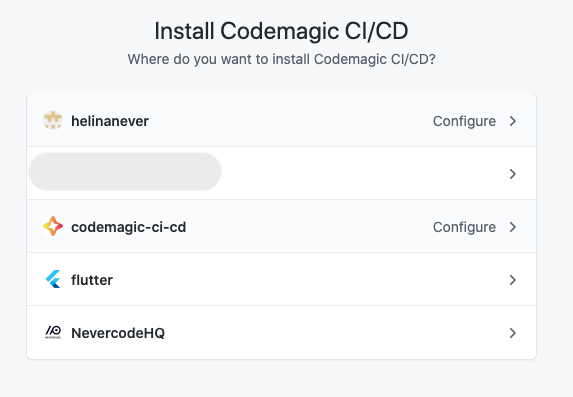
Adding apps from GitHub requires authorizing Codemagic and installing the Codemagic CI/CD GitHub App to a GitHub account or an organization to be able to load the repositories.
- Click Add application in the top right corner of the Applications page.
- You can only add an application to a team with billing enabled where you have the Admin role. If you don’t have the Admin role in any teams, this step is skipped and the application will be added to your personal account.
- Select GitHub as the Git provider. If you have already set up the integration, click Next: Select repository and skip to step 4. If the GitHub integration has not been set up, you’ll see Next: Authorize integration instead. A new window appears for you to authorize Codemagic. Confirm the authorization by clicking Authorize Codemagic CI/CD.
- In the next step, click Install GitHub App to set up the integration. A GitHub page opens in a new window. Select the account or an organization where to install the app and choose whether to give Codemagic access to all the repositories from this account or only selected ones. Finish the installation by clicking Install & Authorize.
- Finally, set up the application by selecting the repository from the dropdown menu and specifying the project type. Click Finish: Add application. You will be then redirected to the app settings.
See the getting started guides and sample projects configured with codemagic.yaml to set up your project. Alternatively, Flutter apps can be also configured using the Flutter workflow editor.
Configuring the GitHub App integration
Codemagic uses the Codemagic CI/CD GitHub App to integrate with GitHub. To share your GitHub repositories with Codemagic, Codemagic GitHub App will have to be installed on the account or organization in GitHub from which you would like to build applications.
- In your user or team settings in Codemagic, navigate to the Integrations section and locate the GitHub App integration. The next steps may vary slightly depending on whether you have already authorized Codemagic or have the Codemagic GitHub App installed.
- Click Connect next to the GitHub App integration, and when redirected to GitHub, click Authorize Codemagic.
- Back in the Integrations section, click Finish installation and then Install app. Note that at this stage you can also revoke your authorization of the app by clicking Disconnect.
- A popup window opens for you to select the organization or account where to install the app. Pick the installation location. You can later install the app to additional accounts.
- Then choose whether to share All repositories from the account or select the repositories to share by choosing Select repositories only.
- Click Install & Authorize to finish installation (you may be asked to confirm that action by entering your password). If you do not have permission to install the app under an organization, you will see the button Authorize & Request instead. An approval from the organization owner or app manager is needed to authorize the installation.
Managing connected GitHub accounts and organizations
In the Integrations section in your user or team settings, click Manage integration > Configure. You can then select an account to configure or install Codemagic GitHub App to additional accounts. The accounts that already have Codemagic GitHub App installed are marked with “Configure”.
You can also access the same settings in GitHub by going directly to https://github.com/apps/codemagic-ci-cd and clicking Configure.
These settings allow you to revisit your repository access configuration should you want to share access to additional repositories or revoke access to a previously shared repository. In addition, you can disconnect an account by clicking Uninstall in the danger zone.
If you revoke access to previously shared repositories, you will still see all your apps and build history but won’t be able to build the apps to which Codemagic no longer has access. Such apps will be grayed out and will show up on the Applications page with the Removed from repository filter.
Disconnecting Codemagic GitHub App integration
Disabling the GitHub App integration deletes the GitHub access token stored by Codemagic, revoking access to the connected GitHub account.
Personal account: Expand the Integrations section in your personal account settings and click Manage integration > Disconnect next to GitHub.
Team: Expand the Team integrations section in your team settings and click Manage integration > Disconnect next to GitHub.
To completely remove the integration, uninstall the Codemagic CI/CD app and revoke the authorization in GitHub. Visit https://github.com/settings/installations for personal accounts or github.com/organizations/your-organization/settings/installations for organization accounts to check whether Codemagic CI/CD is listed both under installed and authorized GitHub Apps.
Repository is unavailable
Here are some tips on what to check if you can’t see your repository listed in Codemagic or it’s shown as unavailable.
- If you chose to grant access to select repositories only as opposed to all repositories when setting up the GitHub App, make sure you have also granted access to the repository in question. Click Manage integration > Configure in team or user integrations to configure repository access settings.
- Your personal Codemagic account and each team have separate integrations. Make sure you have connected the GitHub App integration to the right team.
- If you build apps from different GitHub accounts or organizations, make sure that you have installed the GitHub App on the account that has the repository available. Click Manage integration > Configure to see which accounts have been connected. You can also visit https://github.com/settings/installations for personal accounts or github(dot)com/organizations/your-organization/settings/installations for organization accounts to check whether Codemagic CI/CD is listed both under installed and authorized GitHub Apps.
- Private GitHub repositories can be shared with Codemagic only when the GitHub App is installed on the account that owns the repository. If you are a collaborator to a private repository, please ask the repository owner to install Codemagic GitHub App in GitHub: https://github.com/apps/codemagic-ci-cd
For the best integration with the Git provider, it’s recommended to connect your GitLab repositories using the repository integration built in to Codemagic.
Adding apps from GitLab requires granting access to your GitLab account to enable the integration and load repositories.
- Click Add application in the top right corner of the Applications page.
- You can only add an application to a team with billing enabled where you have the Admin role. If you don’t have the Admin role in any teams, this step is skipped and the application will be added to your personal account.
- Select GitLab as the Git provider and click Next: Authorize integration. A new window appears for you to authorize Codemagic. Confirm the authorization by clicking Authorize. If you have already authorized GitLab, click Next: Select repository instead.
- Set up the application by selecting the repository from the dropdown menu and specifying the project type. Click Finish: Add application. You will be then redirected to the app settings.
See the getting started guides and sample projects configured with codemagic.yaml to set up your project. Alternatively, Flutter apps can be also configured using the Flutter workflow editor.
For the best integration with the Git provider, it’s recommended to connect your Bitbucket repositories using the repository integration built in to Codemagic.
Adding apps from Bitbucket requires granting access to your Bitbucket account to enable the integration and load repositories.
- Click Add application in the top right corner of the Applications page.
- You can only add an application to a team with billing enabled where you have the Admin role. If you don’t have the Admin role in any teams, this step is skipped and the application will be added to your personal account.
- Select Bitbucket as the Git provider and click Next: Authorize integration. A new window appears for you to authorize Codemagic. Confirm the authorization by clicking Grant access. If you have already authorized Bitbucket, click Next: Select repository instead.
- Set up the application by selecting the repository from the dropdown menu and specifying the project type. Click Finish: Add application. You will be then redirected to the app settings.
See the getting started guides and sample projects configured with codemagic.yaml to set up your project. Alternatively, Flutter apps can be also configured using the Flutter workflow editor.
Apps that cannot be added via a repository integration can be cloned from a URL. Authentication for private repositories can be set up via HTTPS or SSH.
Connecting repository via SSH
Click Add application in the top right corner of the Applications page.
You can only add an application to a team with billing enabled where you have the Admin role. If you don’t have the Admin role in any teams, this step is skipped and the application will be added to your personal account.
Select Other and click Next: Select repository.
Enter the Repository URL for cloning the repository. You can find the URL from your repository by clicking Clone / Clone or download. Usually, the URL is in this format:
git@example.com:username/repo.git.Upload the SSH private key file. If your key is password-protected, enter the Private key passphrase.
Alternatively, you can click Generate key pair and have Codemagic create an SSH key pair for you, read more about it below.
Finish setting up the application by selecting the project type and clicking Finish: Add application. You will be then redirected to the app settings.
See the getting started guides and sample projects configured with codemagic.yaml to set up your project. Alternatively, Flutter apps can be also configured using the Flutter workflow editor.
Generating a key pair in Codemagic
On clicking Generate key pair, Codemagic creates a secure 4096 bit SSH key pair. The private key will be used in Codemagic and the public key must be added to your repository settings. Click Copy to clipboard to copy the public key.
- If your repository is hosted on GitHub, GitLab or Bitbucket, add the public key to your repository’s access/deployment keys.
- For self-hosted repositories, request your git server admins to allow access to the provided public key.
After you have added the public key to your repository settings, finish adding the app by clicking Finish: Add application.
Connecting repository via HTTP/HTTPS
- Click Add application in the top right corner of the Applications page.
- Select Other and click Next: Select repository.
- Enter the Repository URL for cloning the repository. You can find the URL from your repository by clicking Clone / Clone or download. Usually, the URL is in this format:
https://example.com/path/to/repository.git. - If the repository is private, then enter your Username and Password, or Username and Personal access token if it’s a GitHub repository. In the case of a public repository, select Public repository.
- Finish setting up the application by selecting the project type and clicking Finish: Add application. You will be then redirected to the app settings.
See the getting started guides and sample projects configured with codemagic.yaml to set up your project. Alternatively, Flutter apps can be also configured using the Flutter workflow editor.
Modifying access
Navigate to App settings > Repository settings to update repository access settings, change the app name or icon in Codemagic, archive or delete the app.
Note that if the app is part of a team, only team admins can update repository access settings or delete the app.
Updating access to the repository
You may need to update repository access settings if the repository has been renamed or relocated, or when you need to update the username and password or the private key used to access it.
If the repository is added via GitHub, Bitbucket or GitLab integration, click the Update repository URL button. Codemagic will attempt to automatically update the URL based on the repository ID.
If the repository is added from a URL, click Change settings under Repository access settings. This will allow you to modify the repository URL, change username or password or update the SSH key. You can also generate a new private key in the settings section. Once you have changed the relevant settings, click Update access settings. Codemagic will verify that it has access to the repository using the updated details before saving the settings.
Firewall configuration for privately hosted repositories
If your repositories are within an internal network / behind a firewall, which is usually the case with enterprises, the network configuration of these repositories must be configured for external access.
Codemagic requires direct access to the repositories for the following use cases:
- For retrieving the repository information such as the branches and the commits.
- For cloning the repository to the build machine during the build.
The following IP addresses must be allowed through the firewall (whitelisted):
Fetching IP addresses...
Since Codemagic needs to access the Git service, please allow ports that your service uses - usually the default SSH or HTTPS ports.
Configuring Monorepo repositories
A Monorepo is a version-controlled code repository that holds many projects in a single repository. Codemagic supports working with monorepo apps. The very first step is creating a Codemagic account and adding your monorepo app from its codebase such as GitHub, Gitlab, Bitbucket, or self-hosted repositories. More information about how to sign up can be found here.
To begin with, codemagic.yaml file must be created in the root directory of the repository. By default, the working directory is the root of the repository. The basic structure looks like this:
workflows:
  default-workflow:
    name: Default workflow
    instance_type: mac_mini_m2
    max_build_duration: 60
    environment:
      flutter: stable
      xcode: latest
      cocoapods: default
    scripts:
      # Add scripts here
    artifacts:
      - build/**/outputs/**/*.apk
      - build/ios/ipa/*.ipa
    publishing:
      email:
        recipients:
          - name@example.com
In order to target apps inside your monorepo app, working_directory key is used. For example, the following sample snippet shows how it works:
workflows:
  default-workflow:
    name: Default workflow
    # Specify path to the app folder like this
    working_directory: my_first_app
By defining working_directory, every command that is defined in the scripts section will run inside that particular directory which is “my_first_app” in our sample above.
In order to manage your working directories easily, it is recommended to create multiple workflows and configure them accordingly:
workflows:
  my-first-app-workflow:
    name: Drivers app workflow
    working_directory: my_first_app
    # ...

  my-second-app-workflow:
    name: Passengers app workflow
    working_directory: my_second_app
A sample project can be found here. You can also checkout the blog article How to manage your Flutter monorepo.