Google Play publishing with Flutter workflow editor
Deploy a Flutter app to Google Play using the Flutter workflow editor
Codemagic enables you to automatically publish your app to the internal, alpha, beta and production tracks on Google Play. To do so, you must first set up Android code signing and then configure publishing to Google Play.
Requirements
- Setting up access using Google Play API as shown below.
- A service account in Google Play Console to obtain the JSON credentials file
- Granting the necessary App permissions and access permissions to the service account.
- You must build the app in release mode and set up Android code signing. You can check it here.
Before releasing the app to Google Play, ensure that it meets Google Play’s best practices guidelines.
Setting up Google Play API access
To allow Codemagic to publish applications to Google Play, it is necessary to set up access using Google Play API.
Open your app’s project on the Google Cloud Console (or create a new one here if necessary).
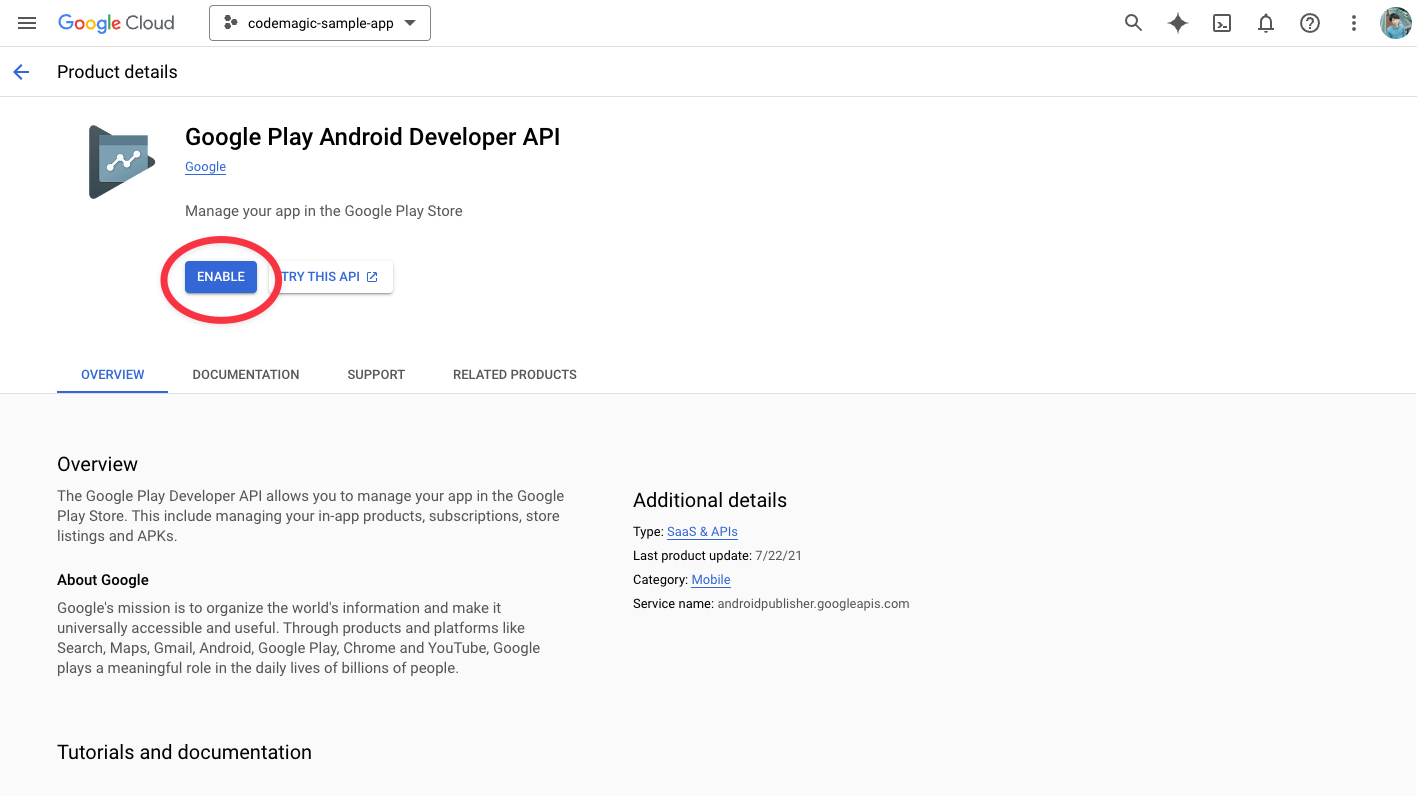
Enable the Google Play Android Developer API.
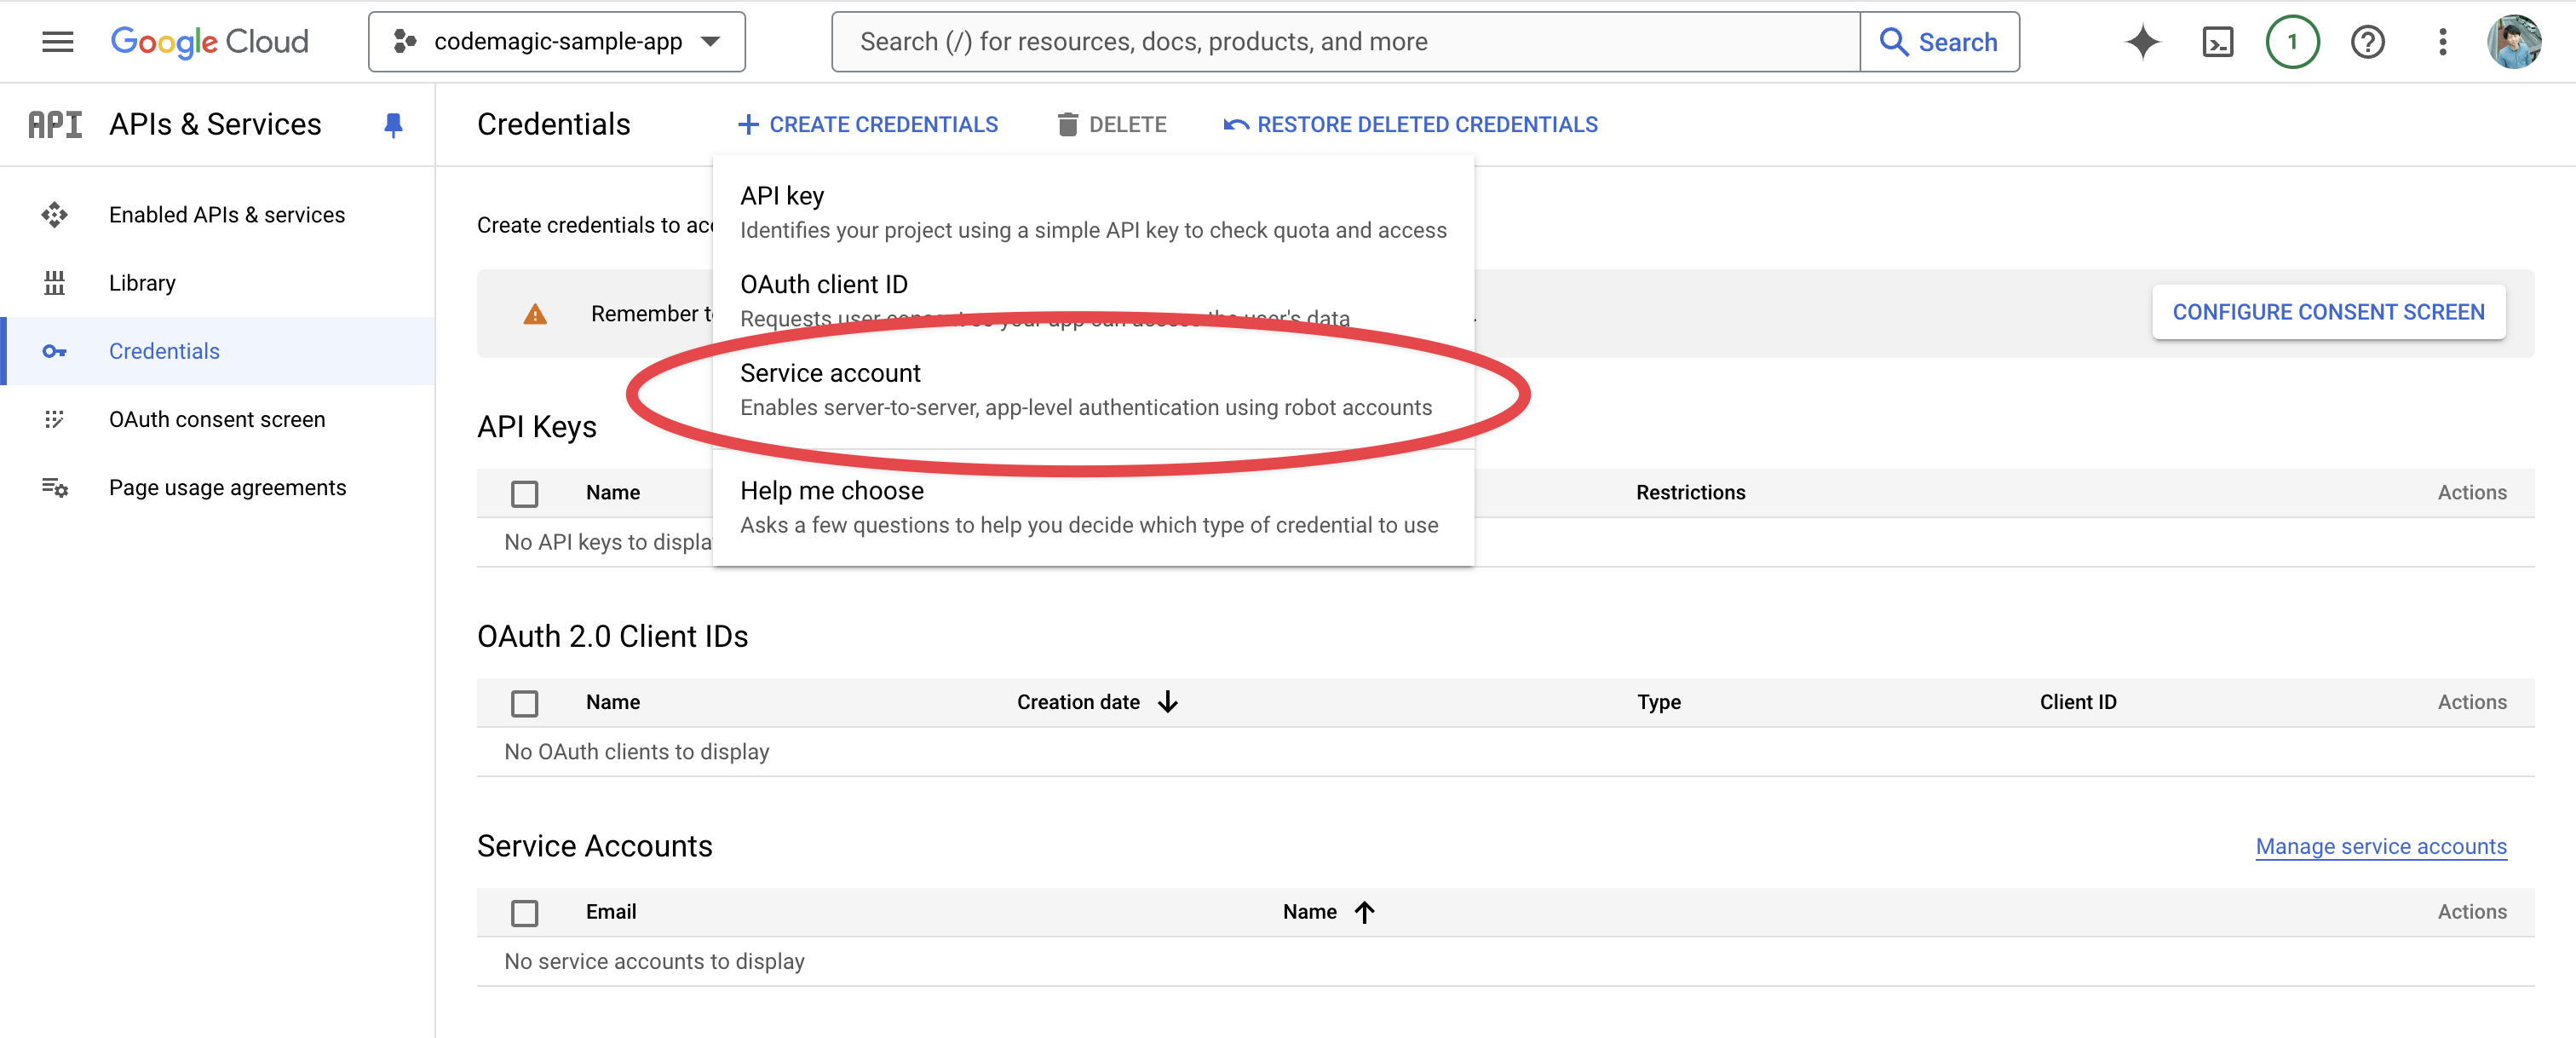
Create a new service account from CREATE CREDENTIALS on the Credentials menu page.
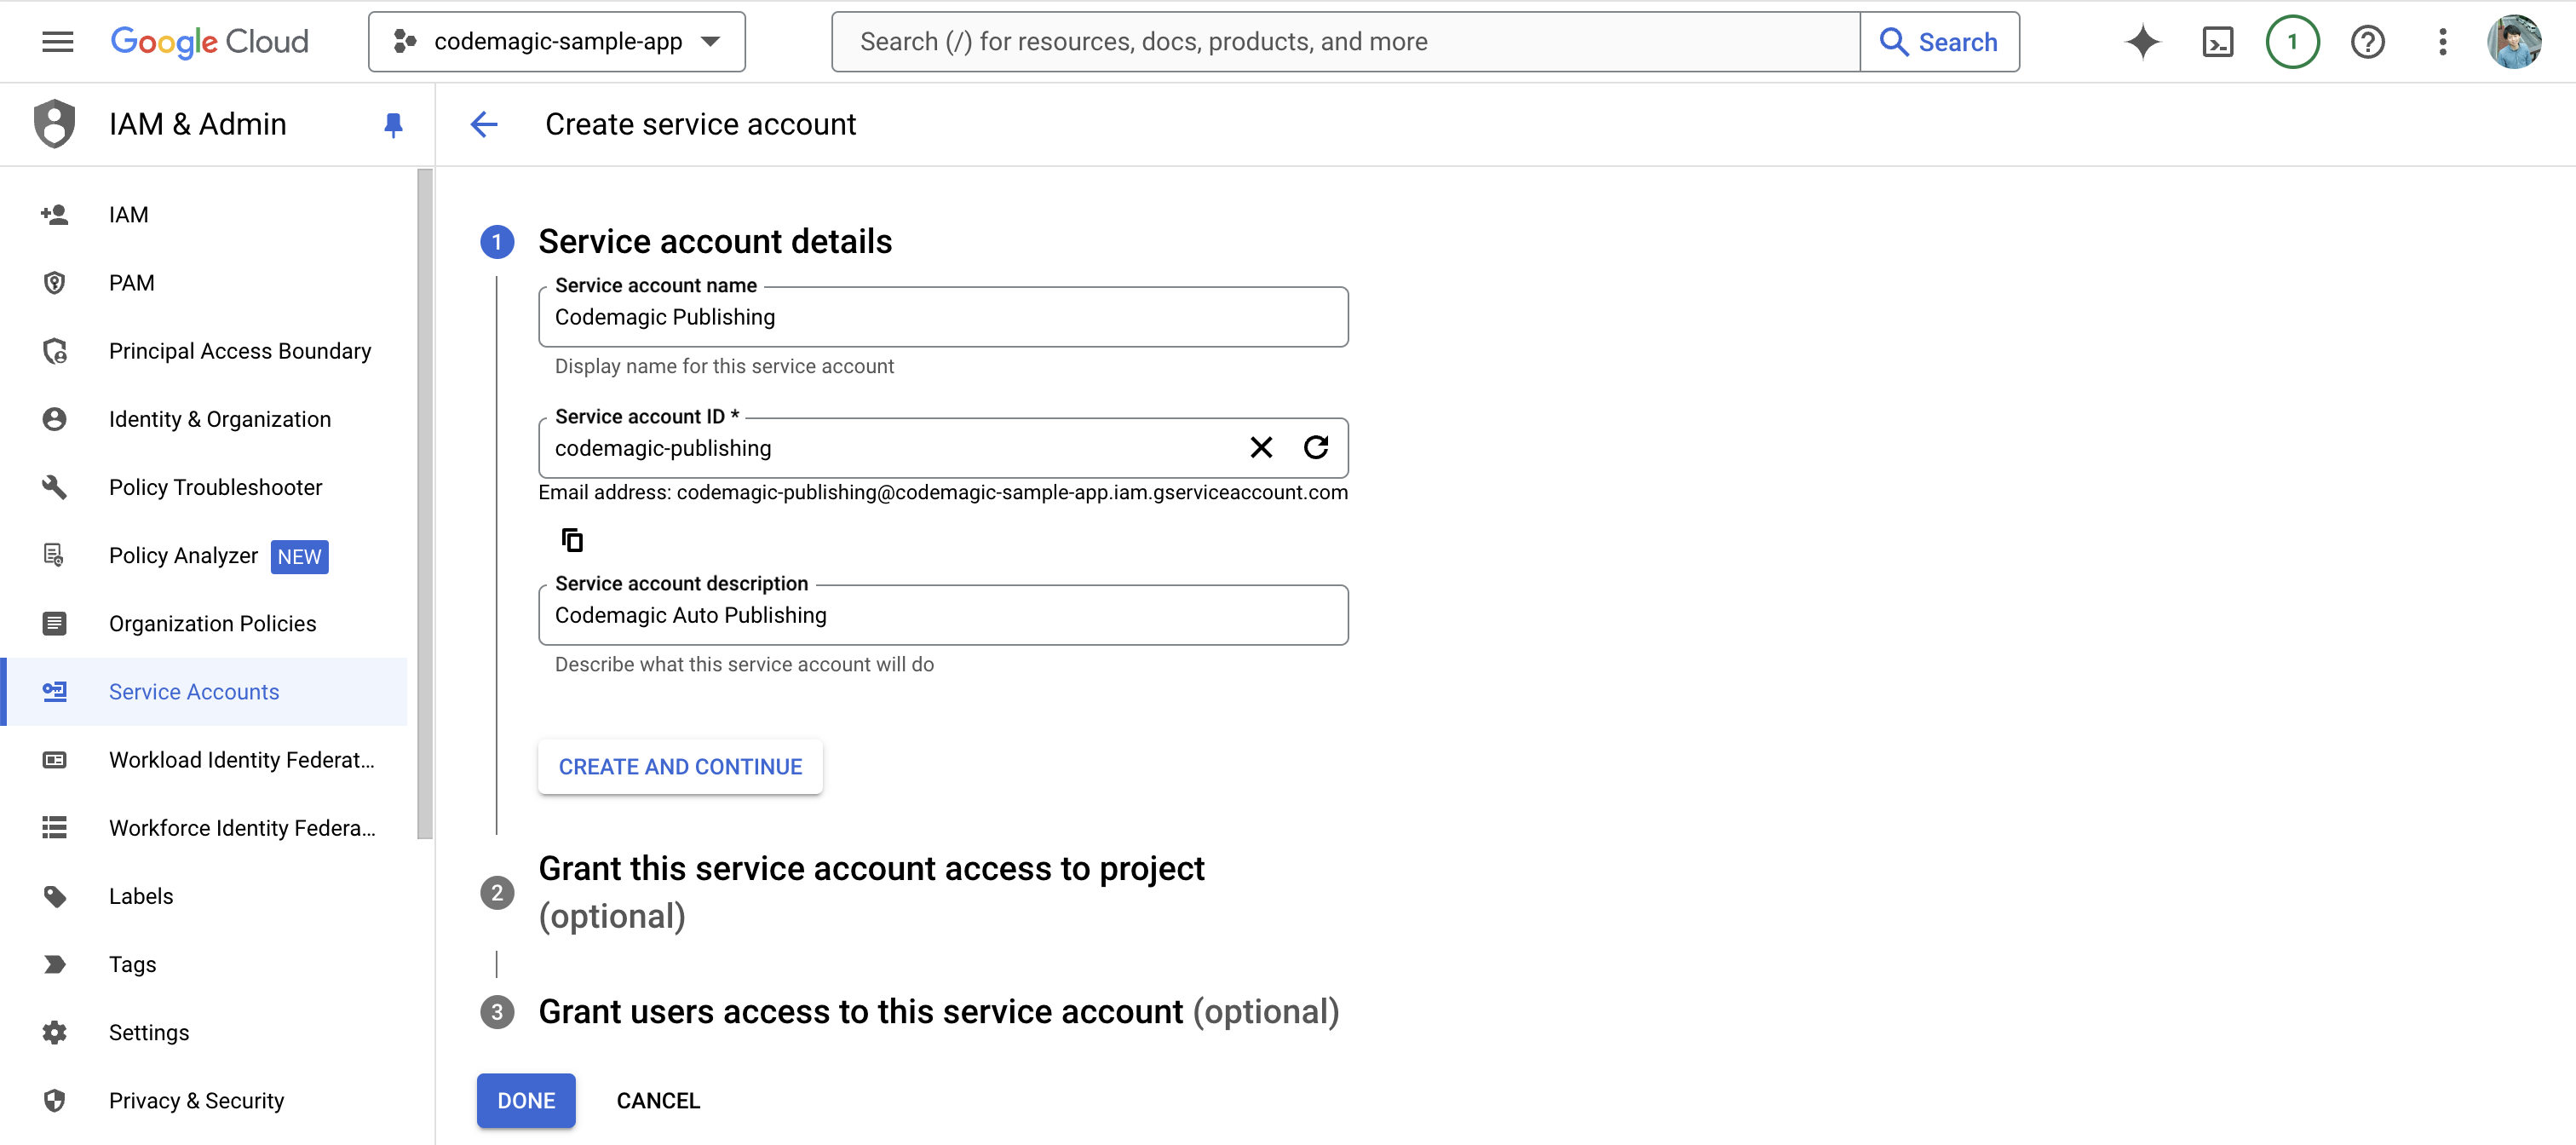
In Step 1, enter the account name and description.
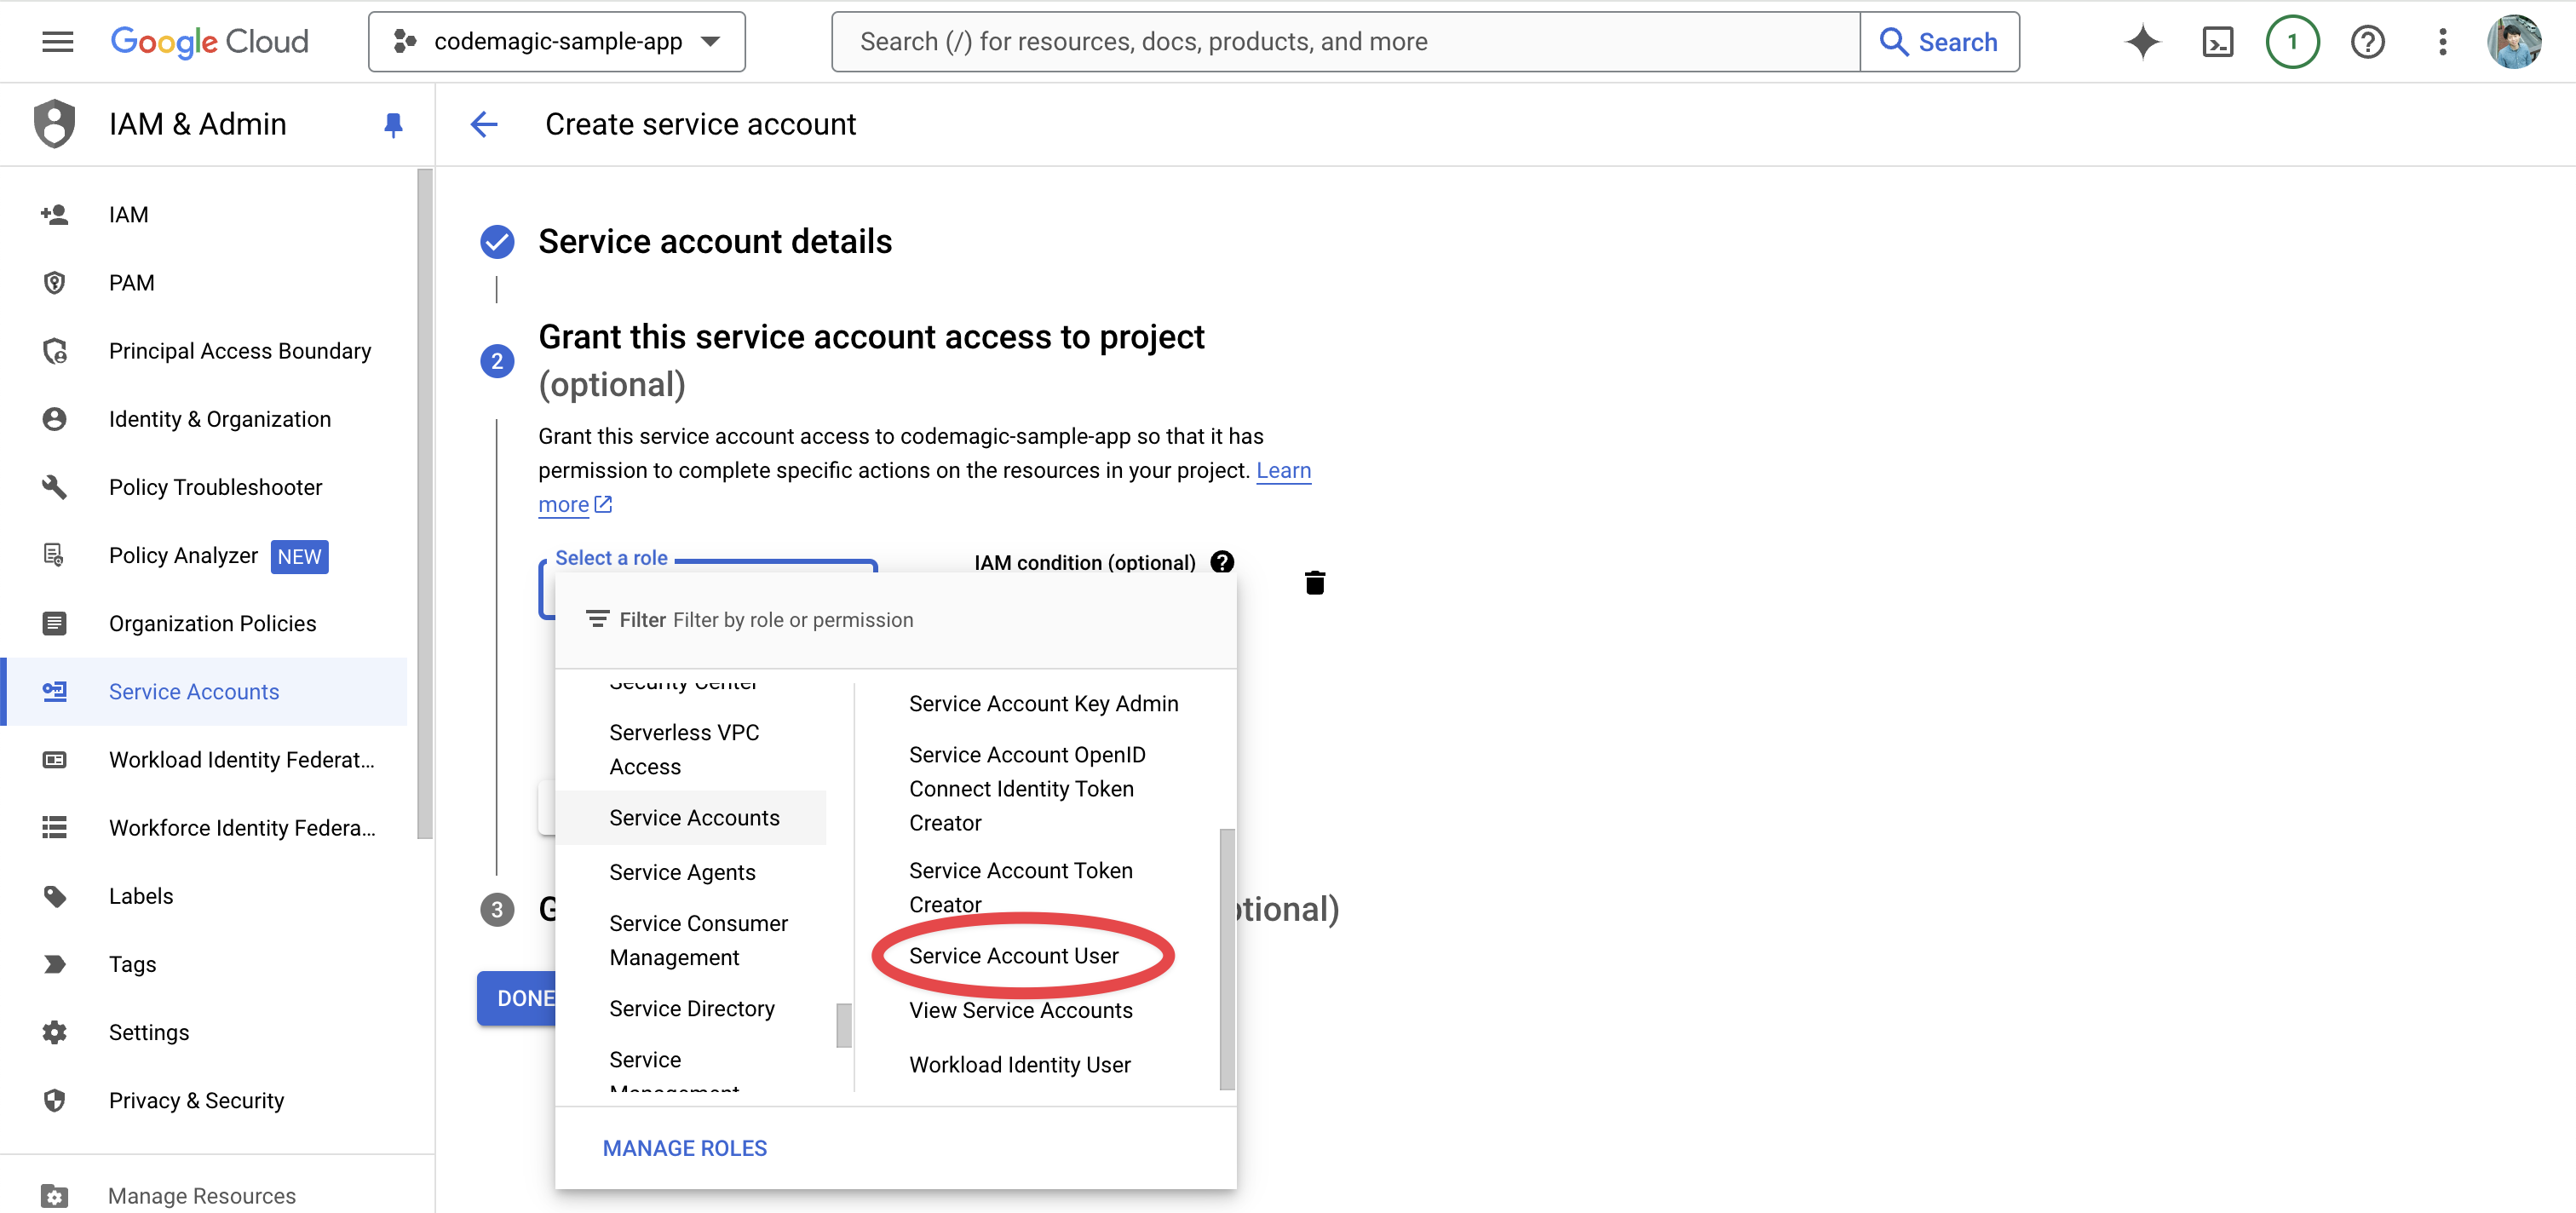
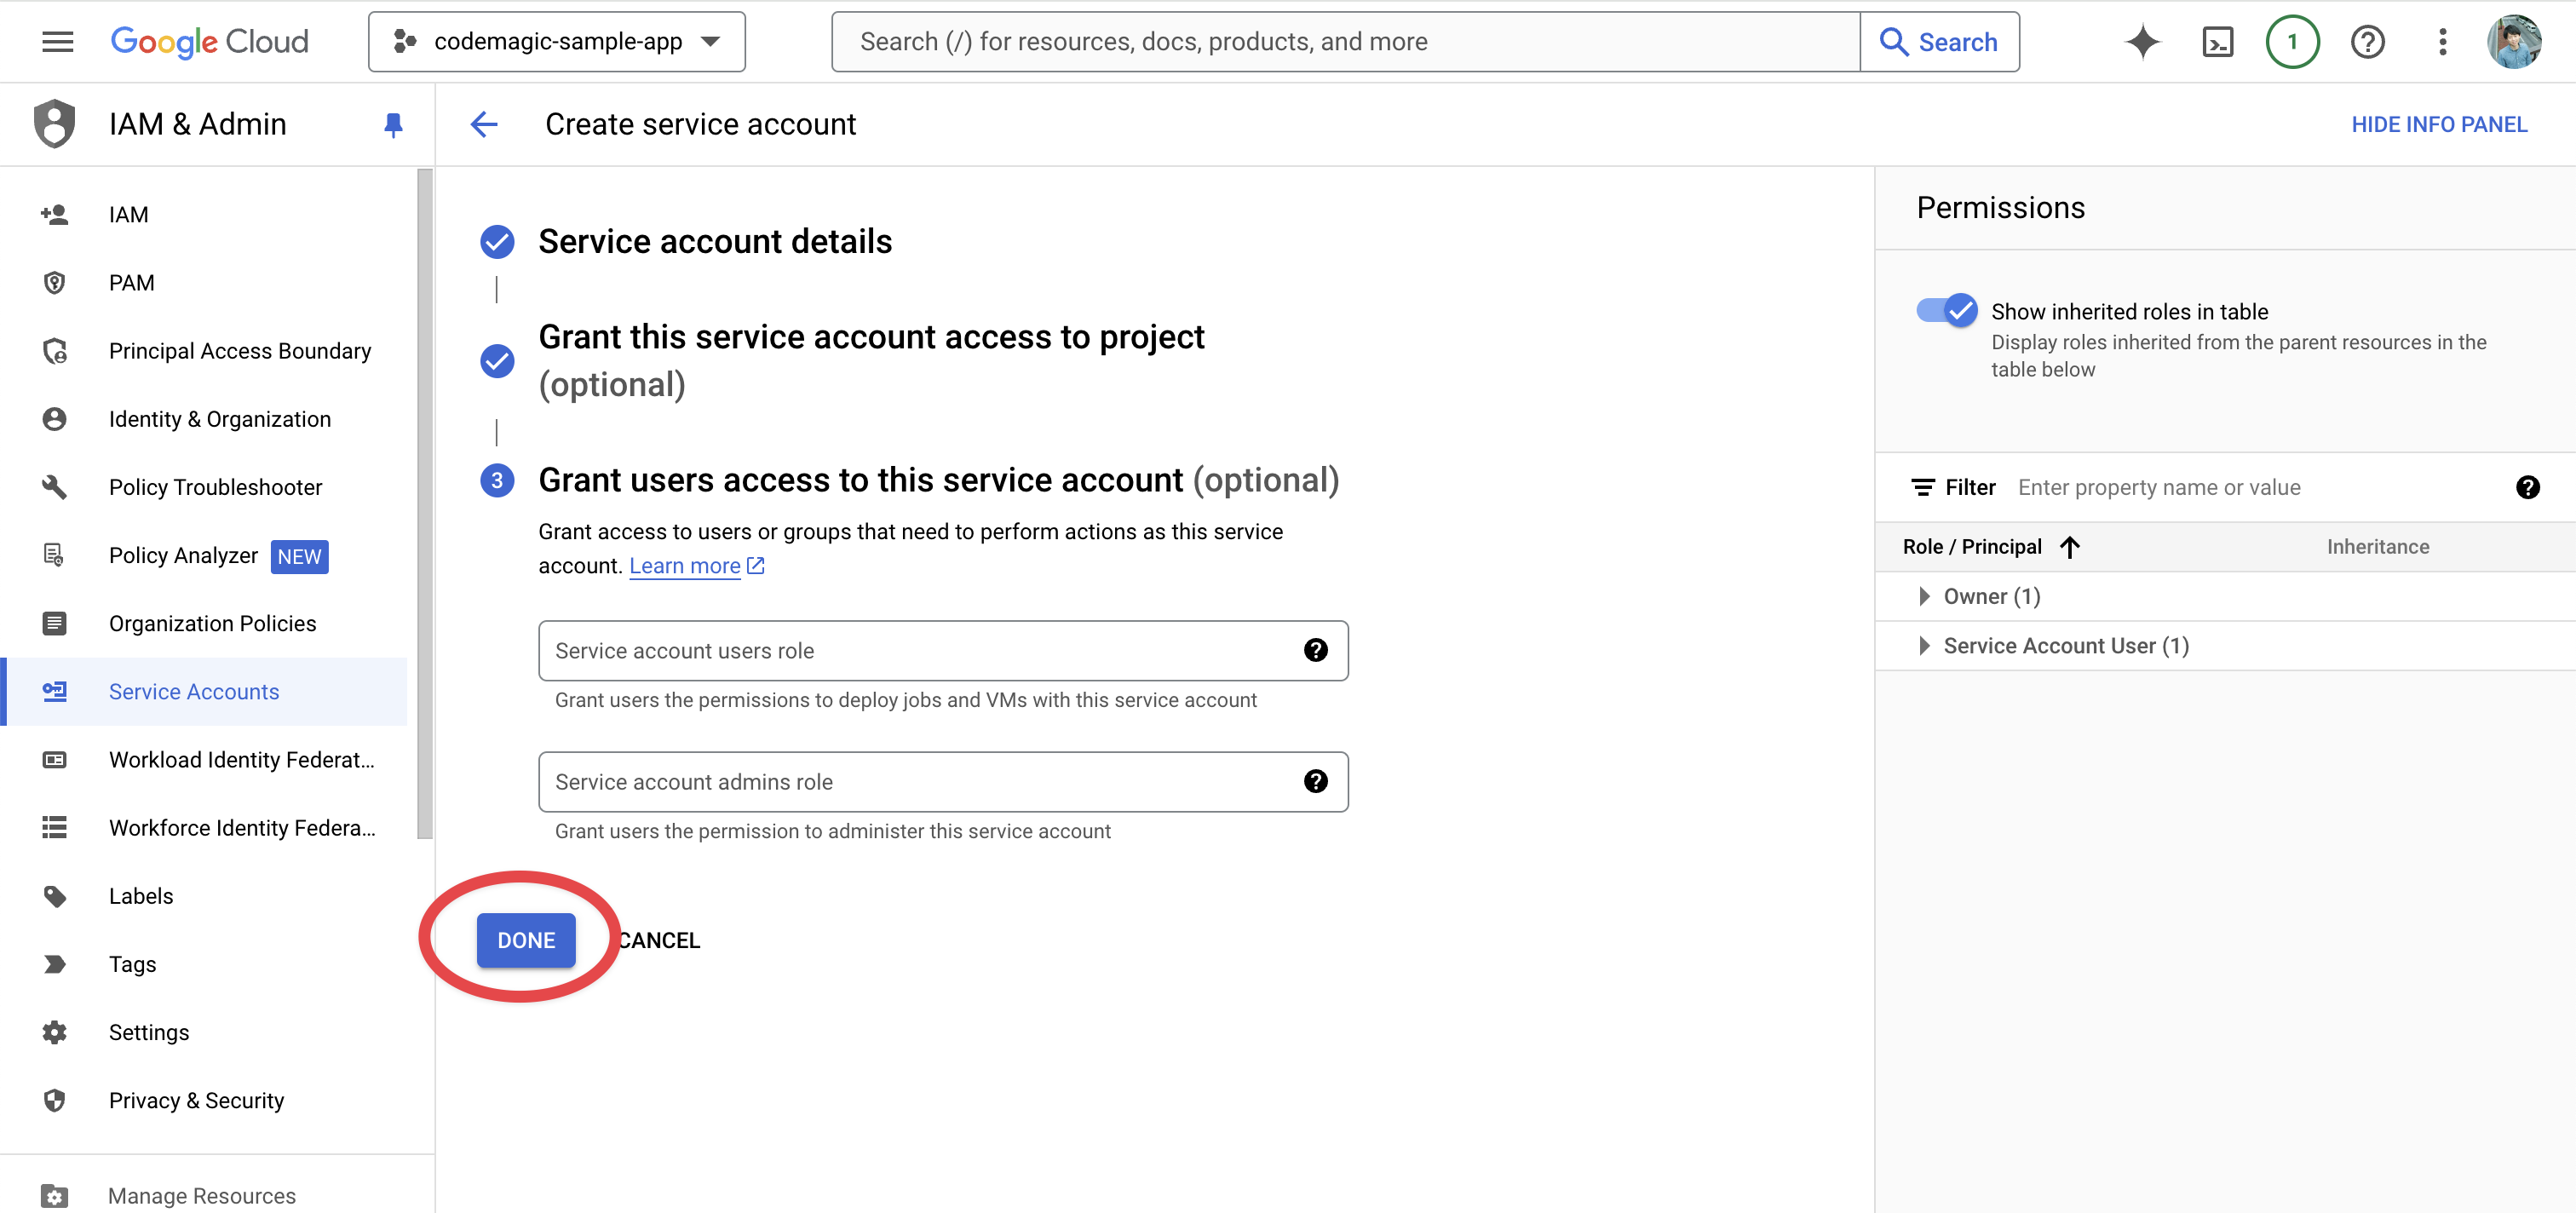
In Step 2, select the Service Accounts > Service Account User role.
Step 3 is unnecessary, so complete it by clicking Done.
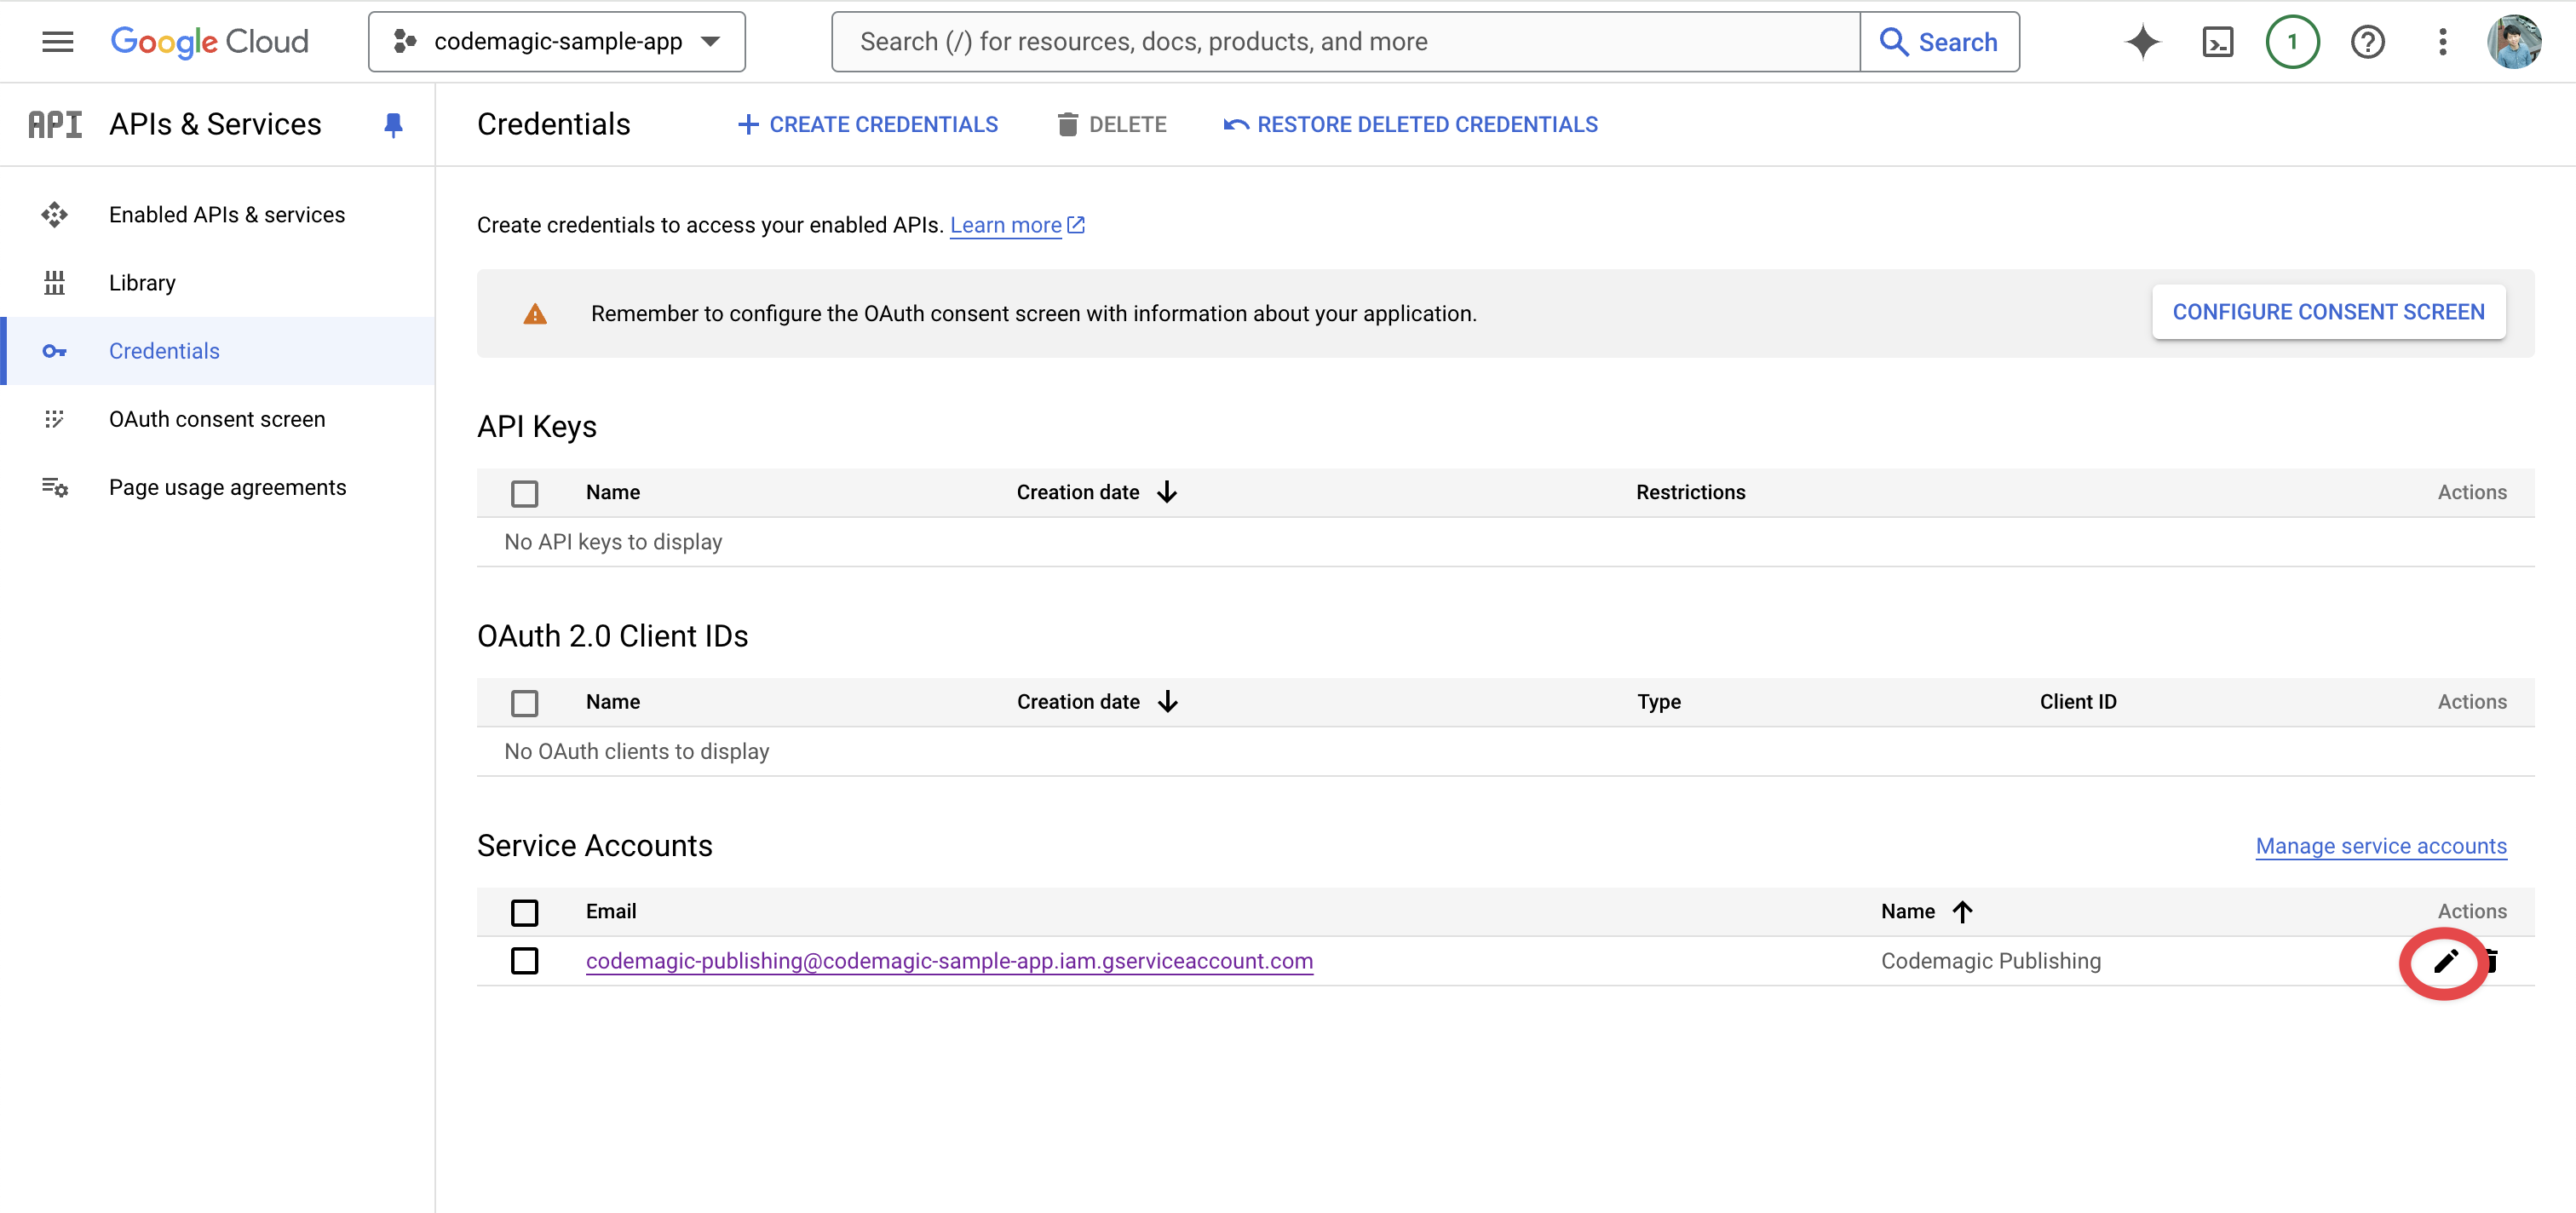
Open the edit page from the Actions column of the created service account.
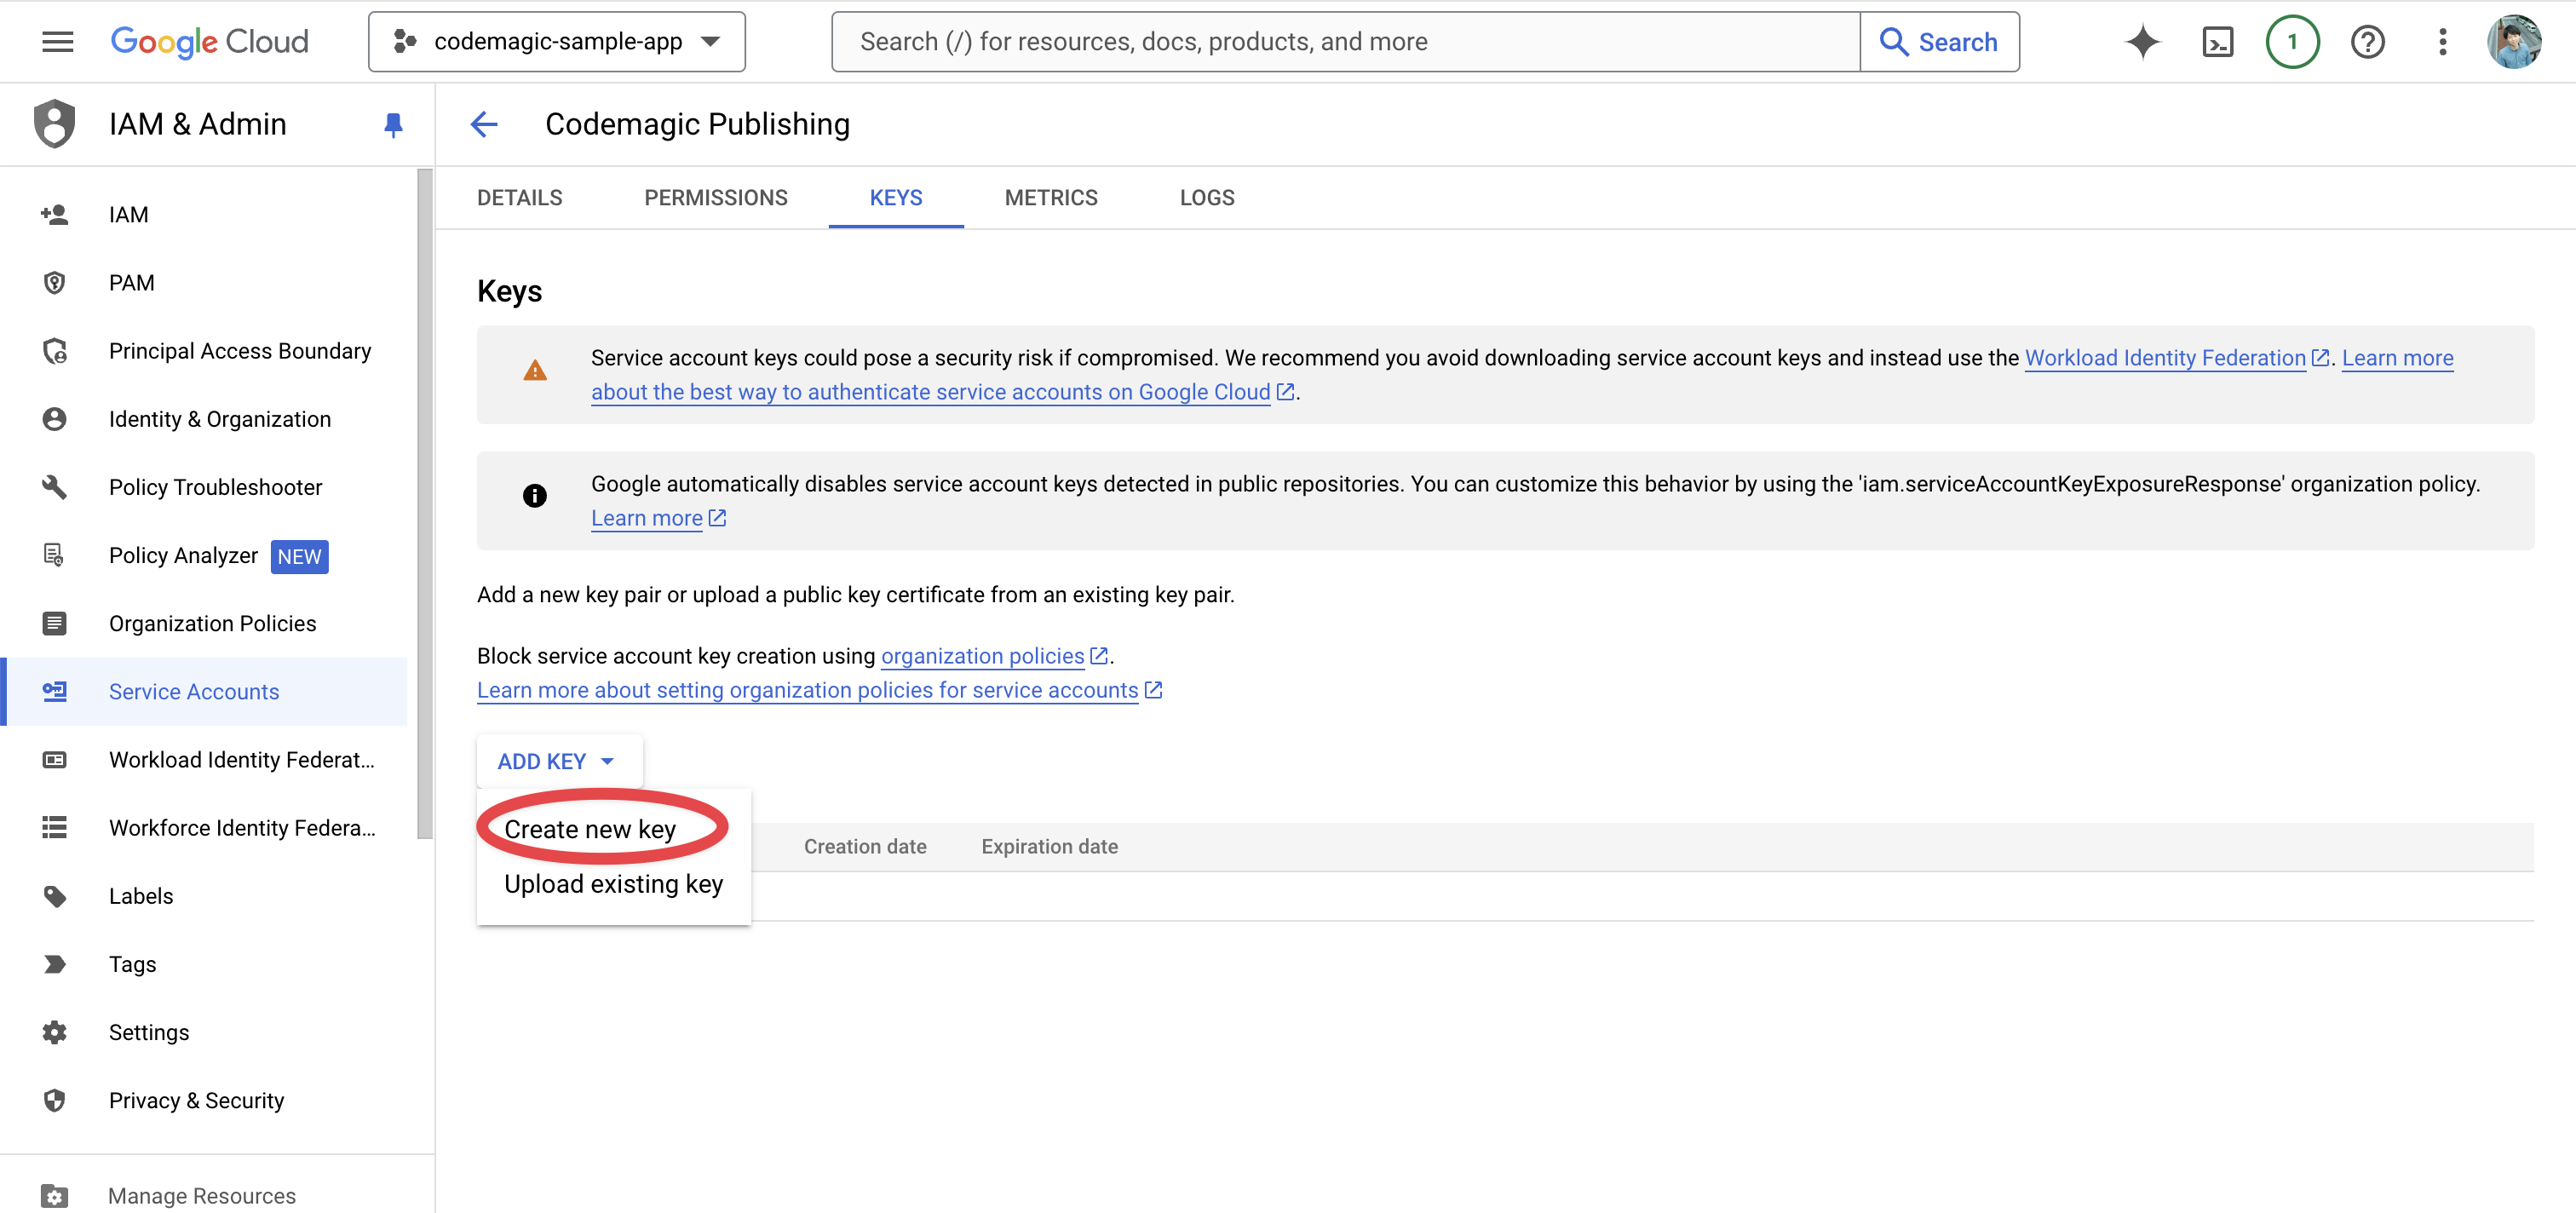
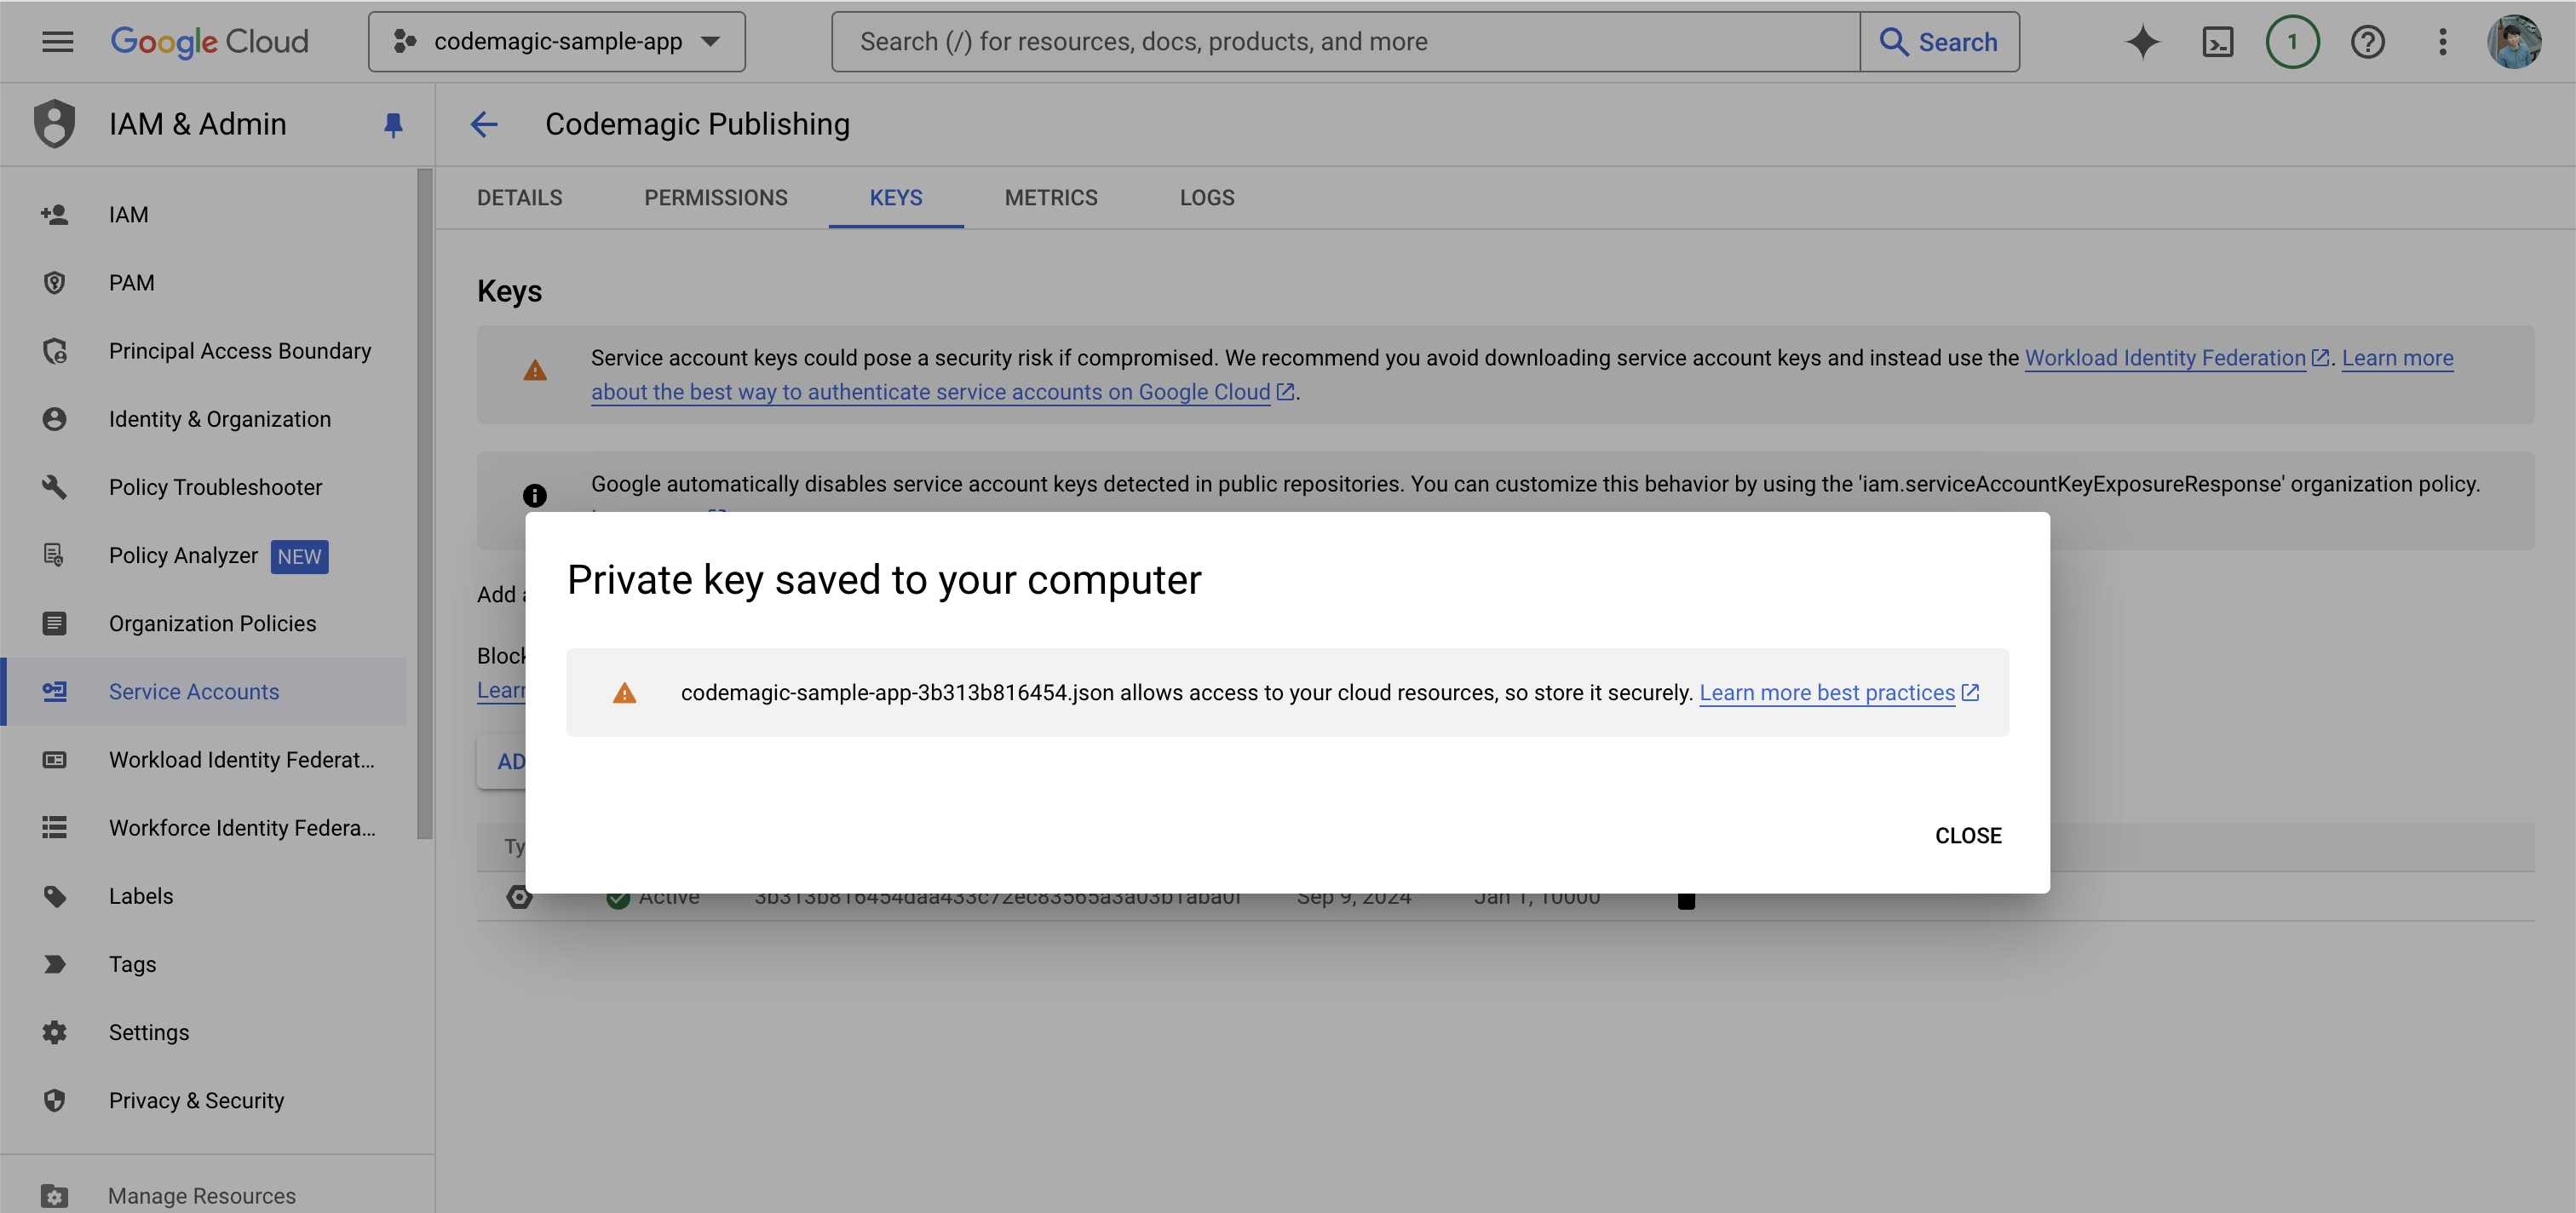
From the KEYS tab page, click on ADD KEY > Create new key.
Select JSON as the Key type and create a new key.
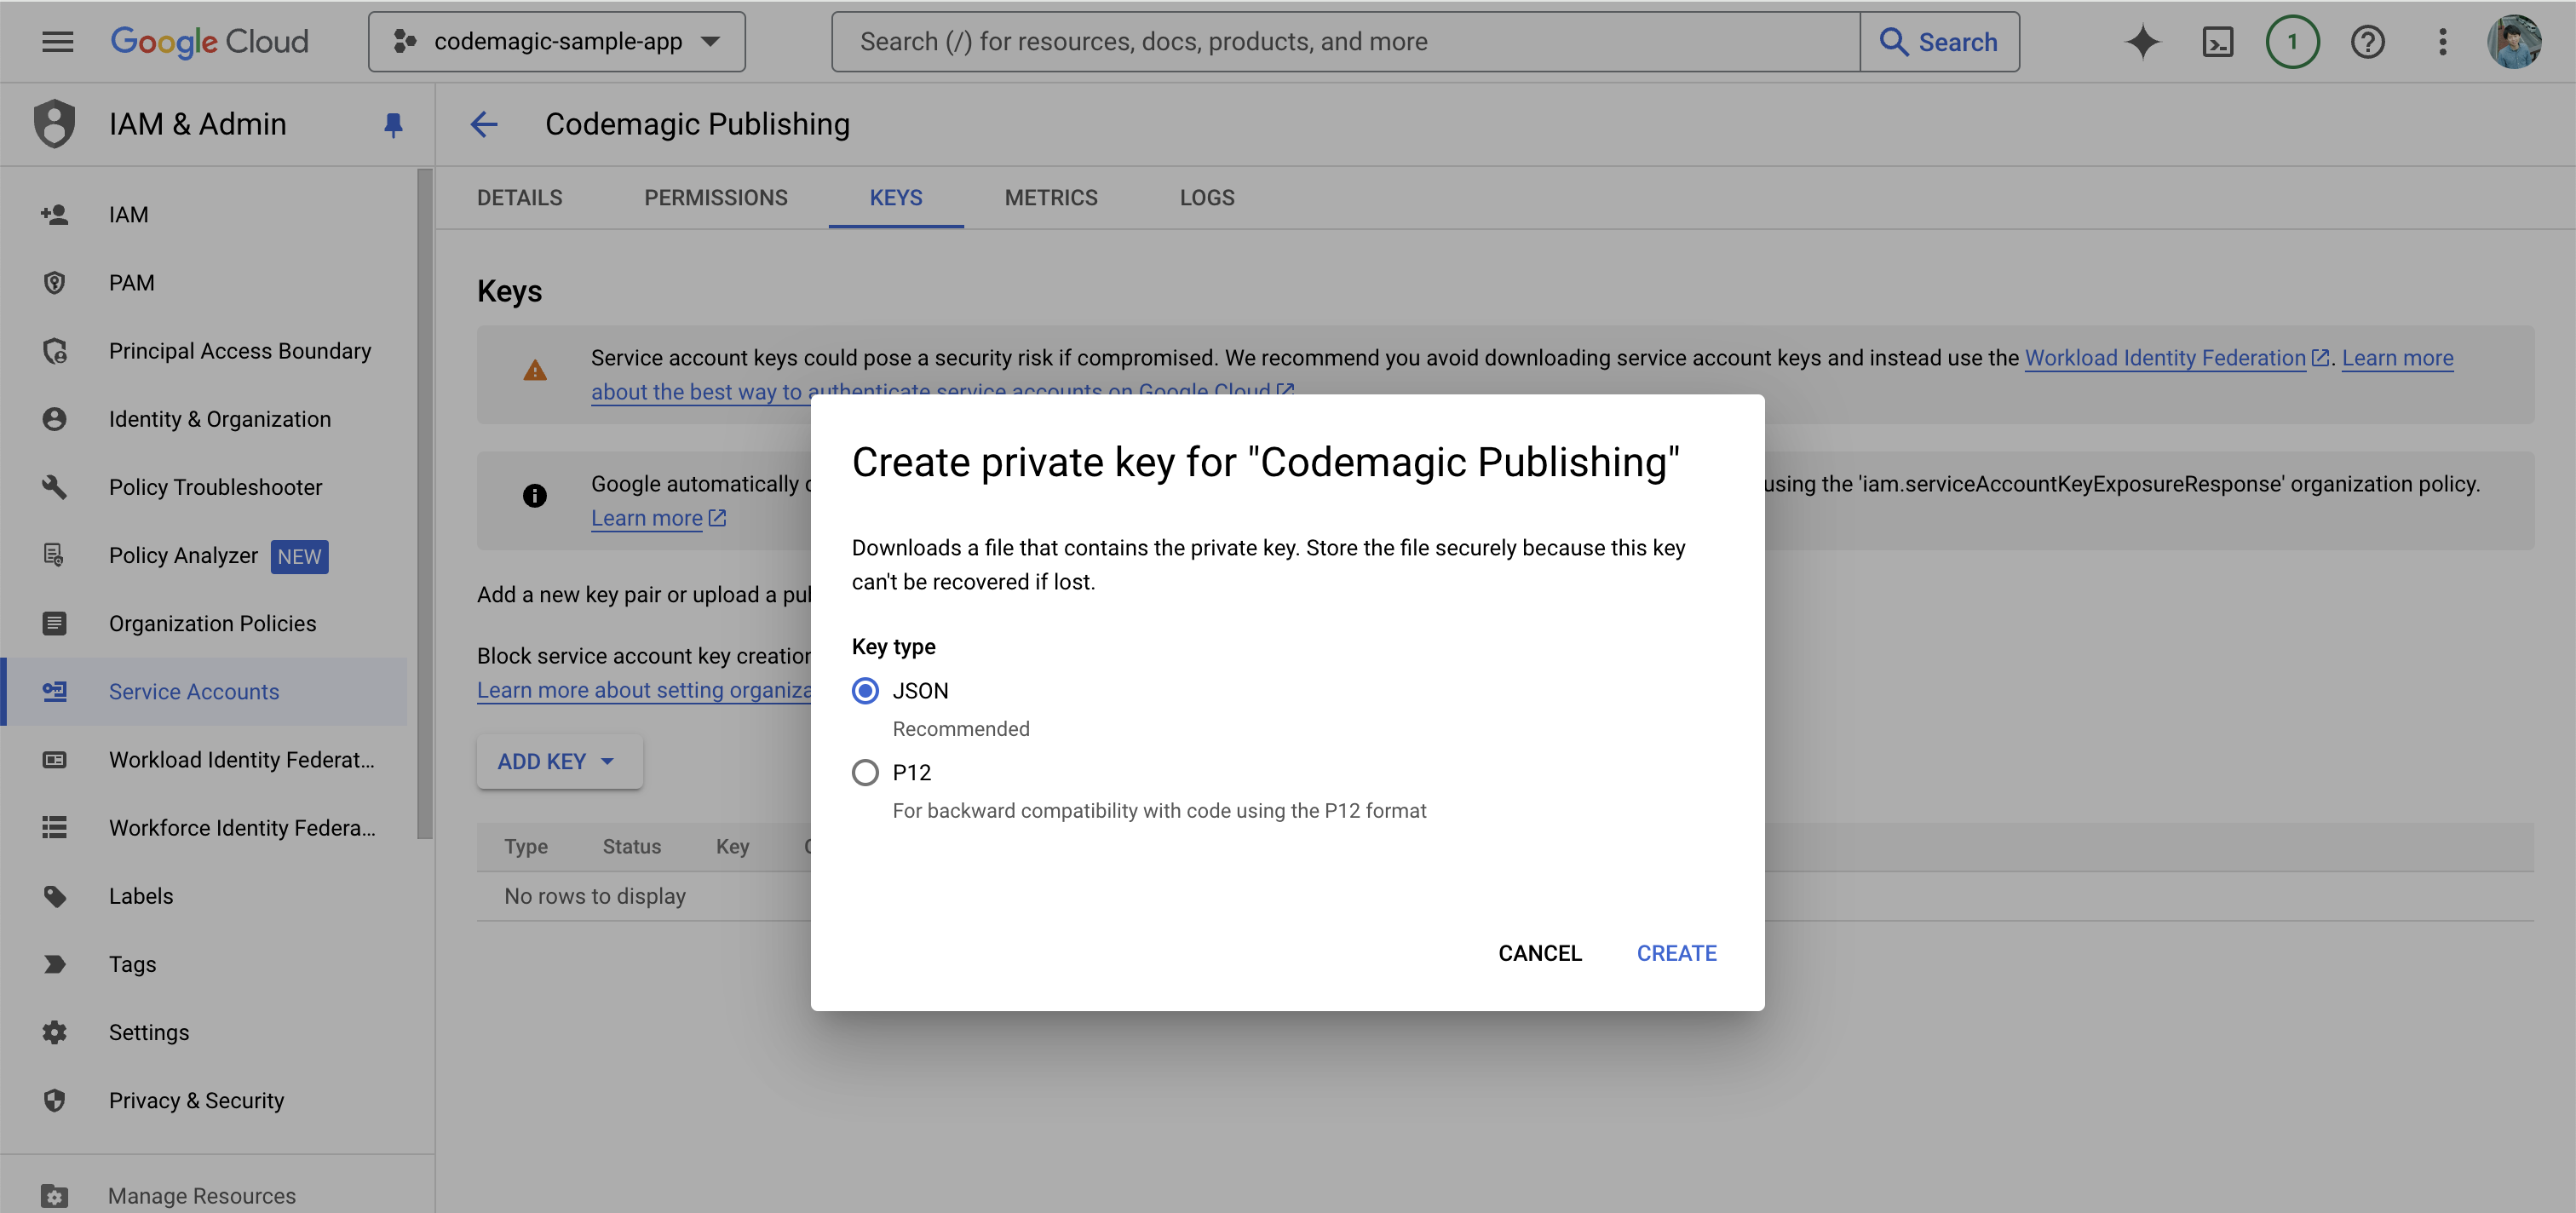
The private key for this service account will be downloaded. Please store it in a safe place as it will be necessary later for the Codemagic configuration.
Once you’ve completed this, let’s move to the Google Play Console.
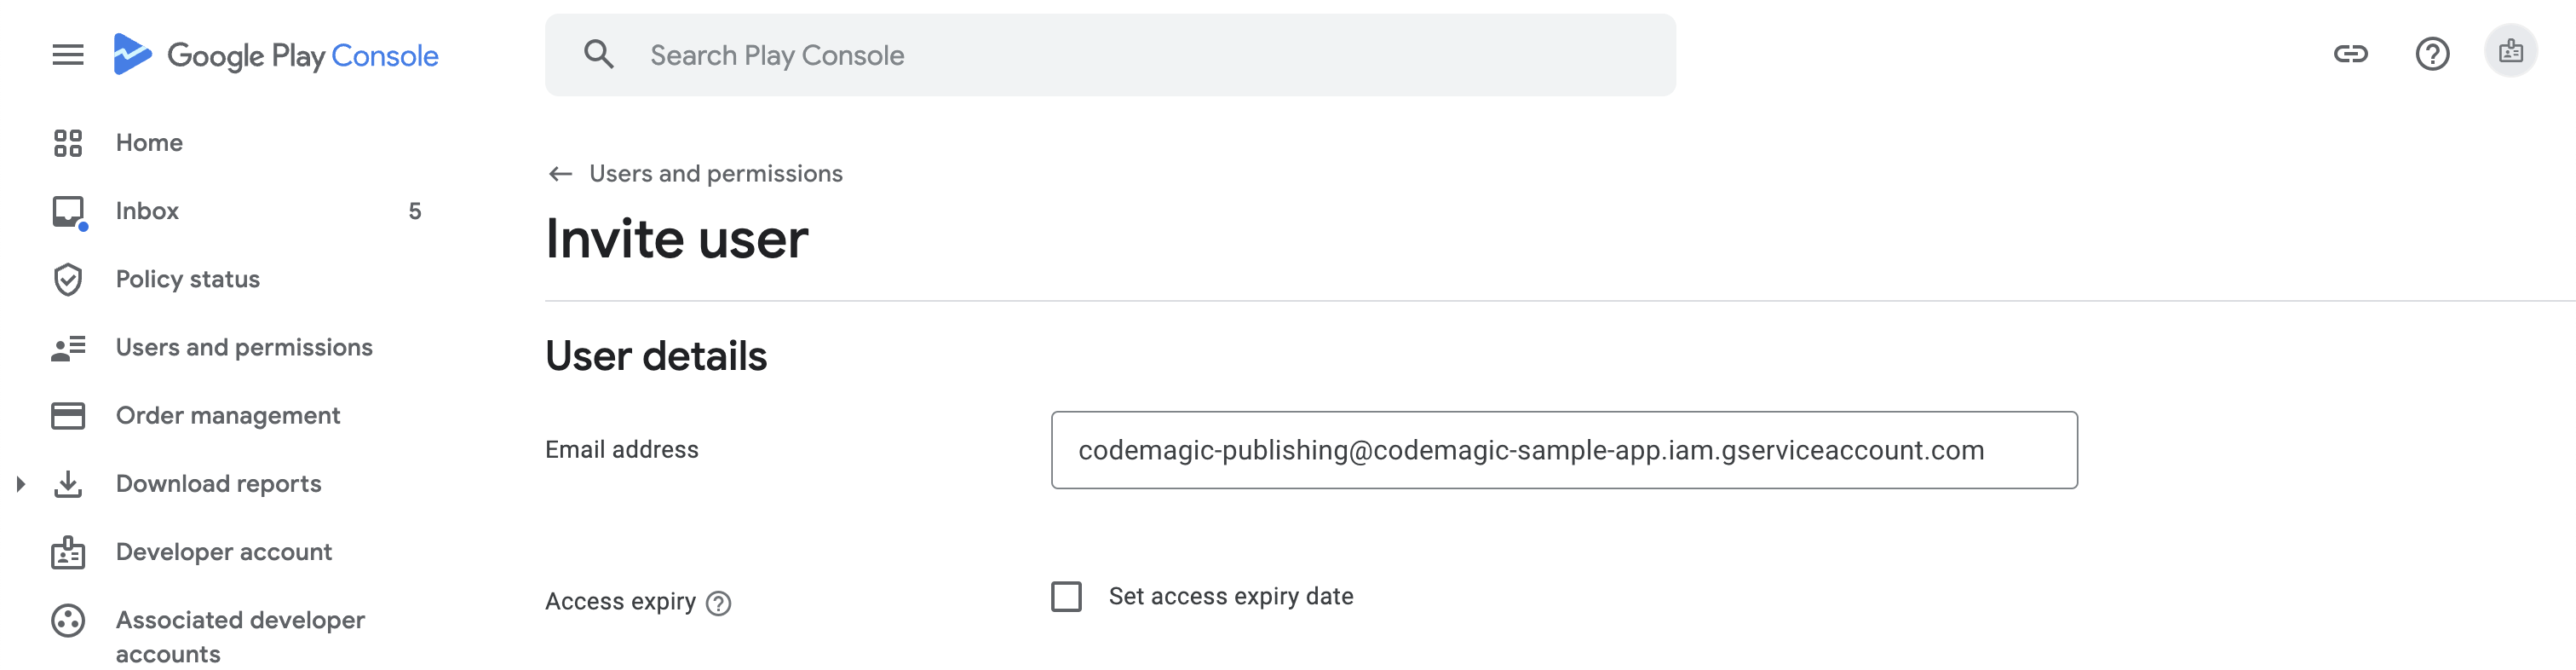
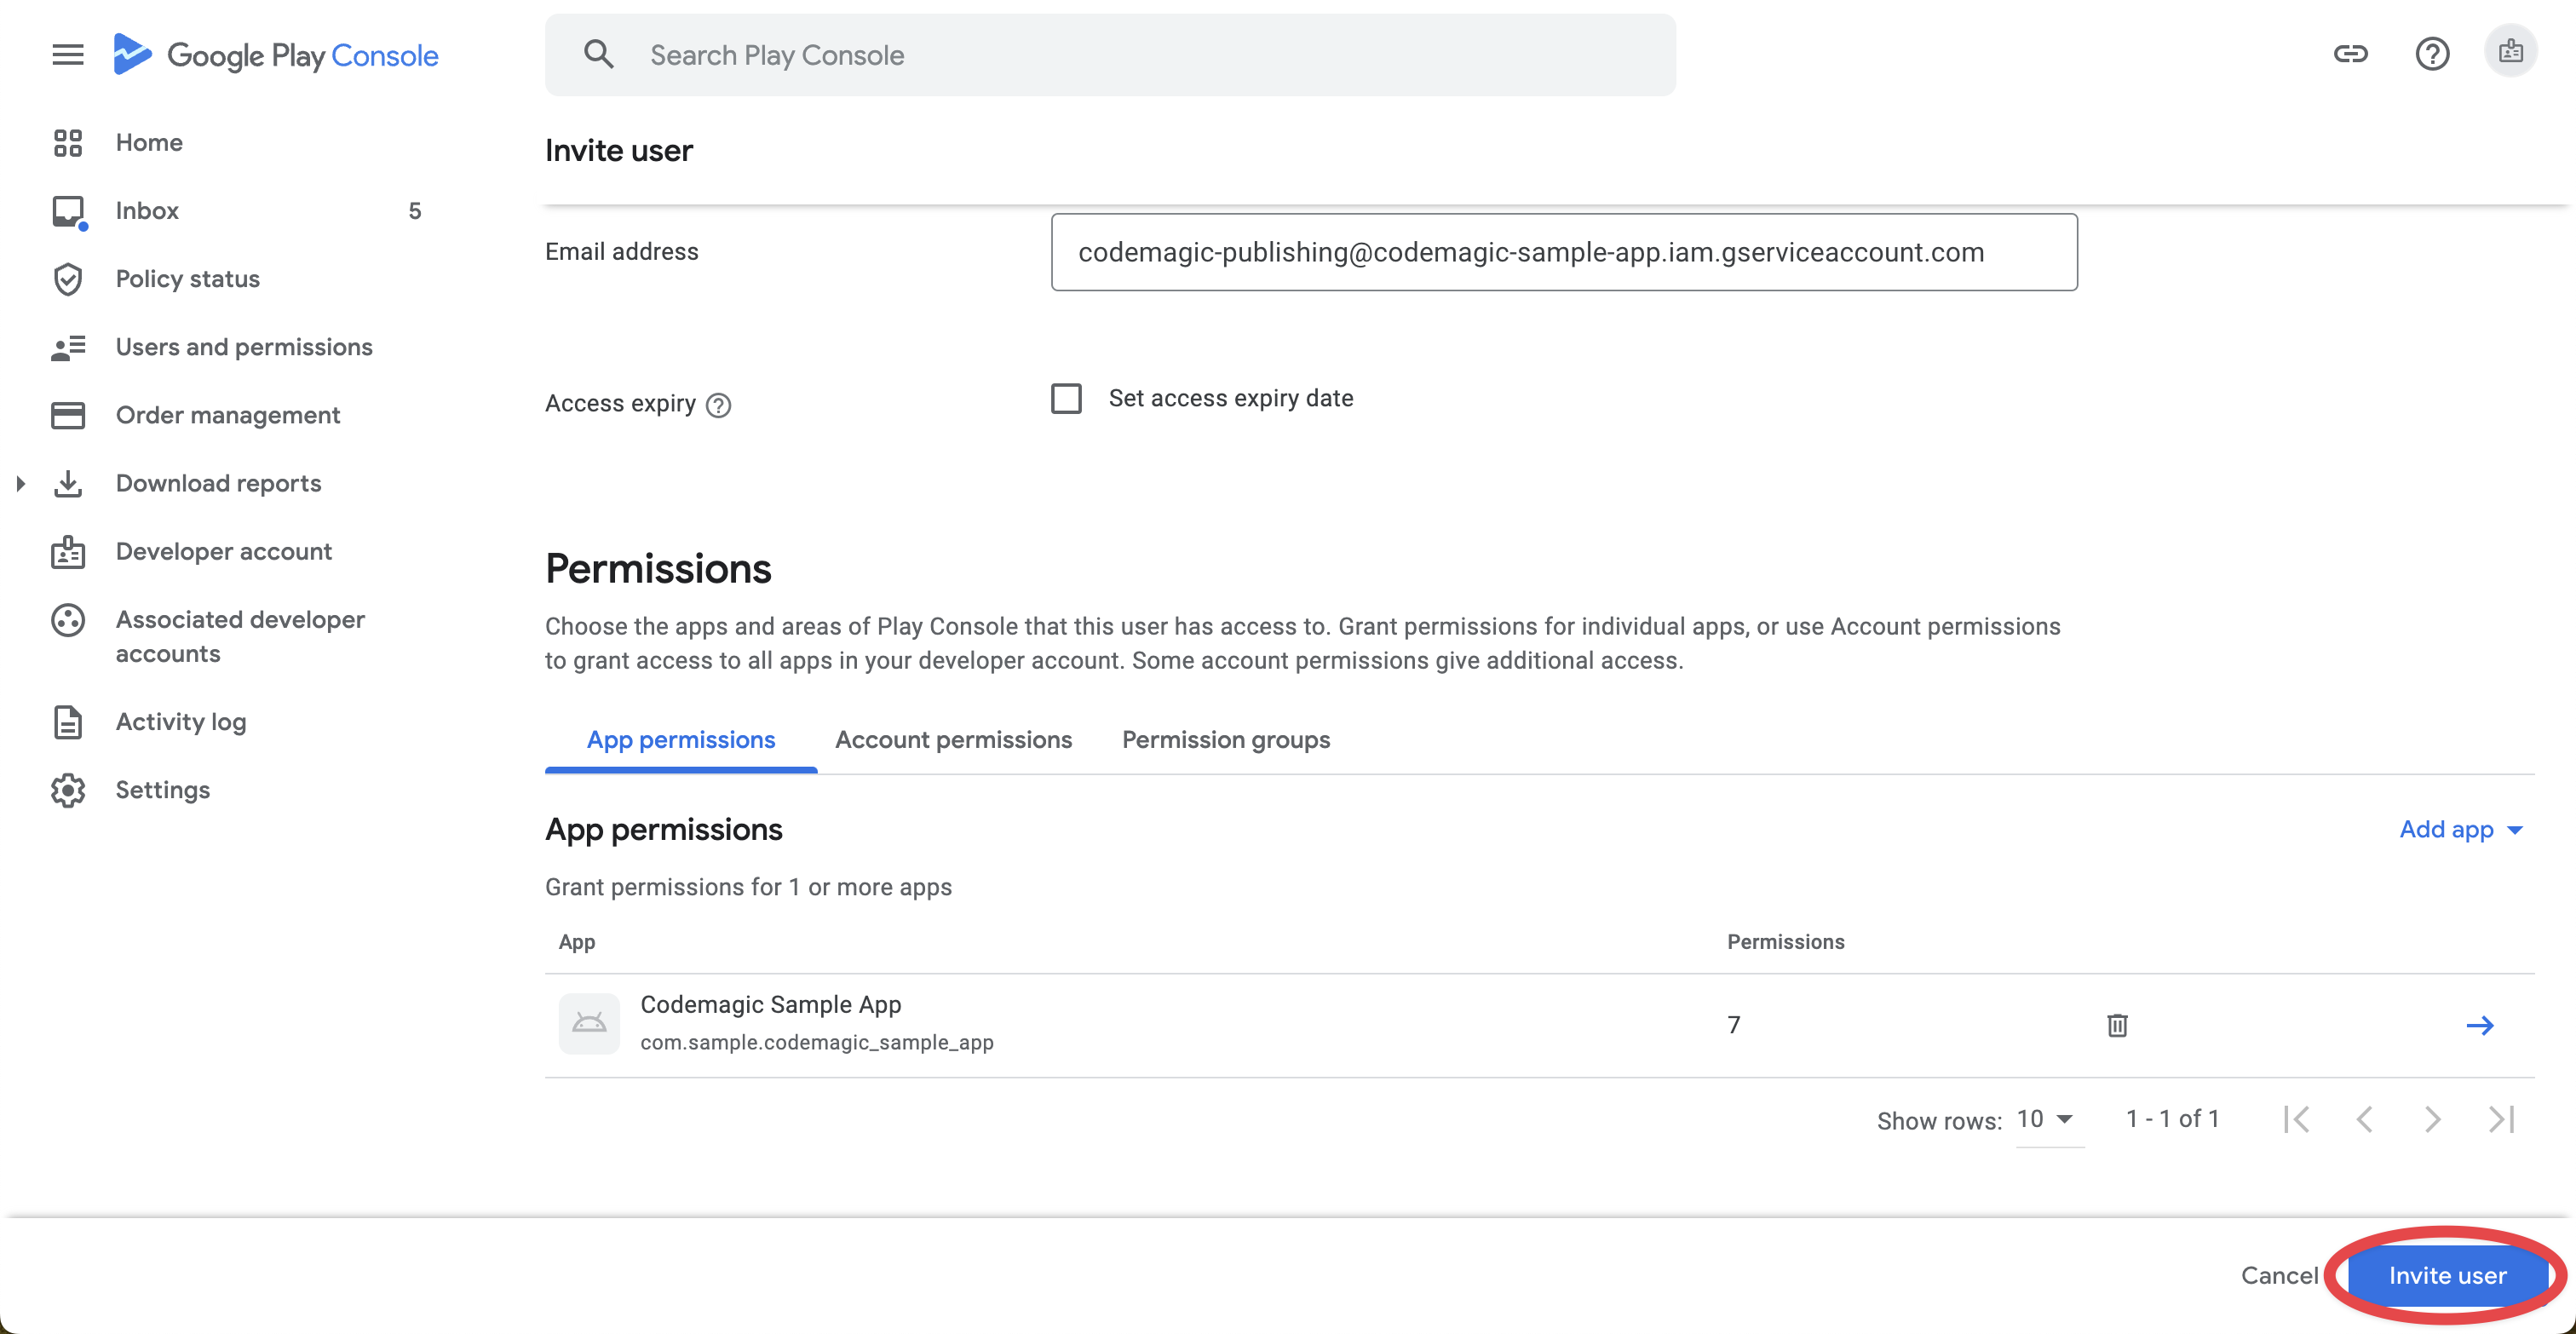
Click on Invite new users on the Users and permissions page.

For the Email address, enter the one for the service account you just created.
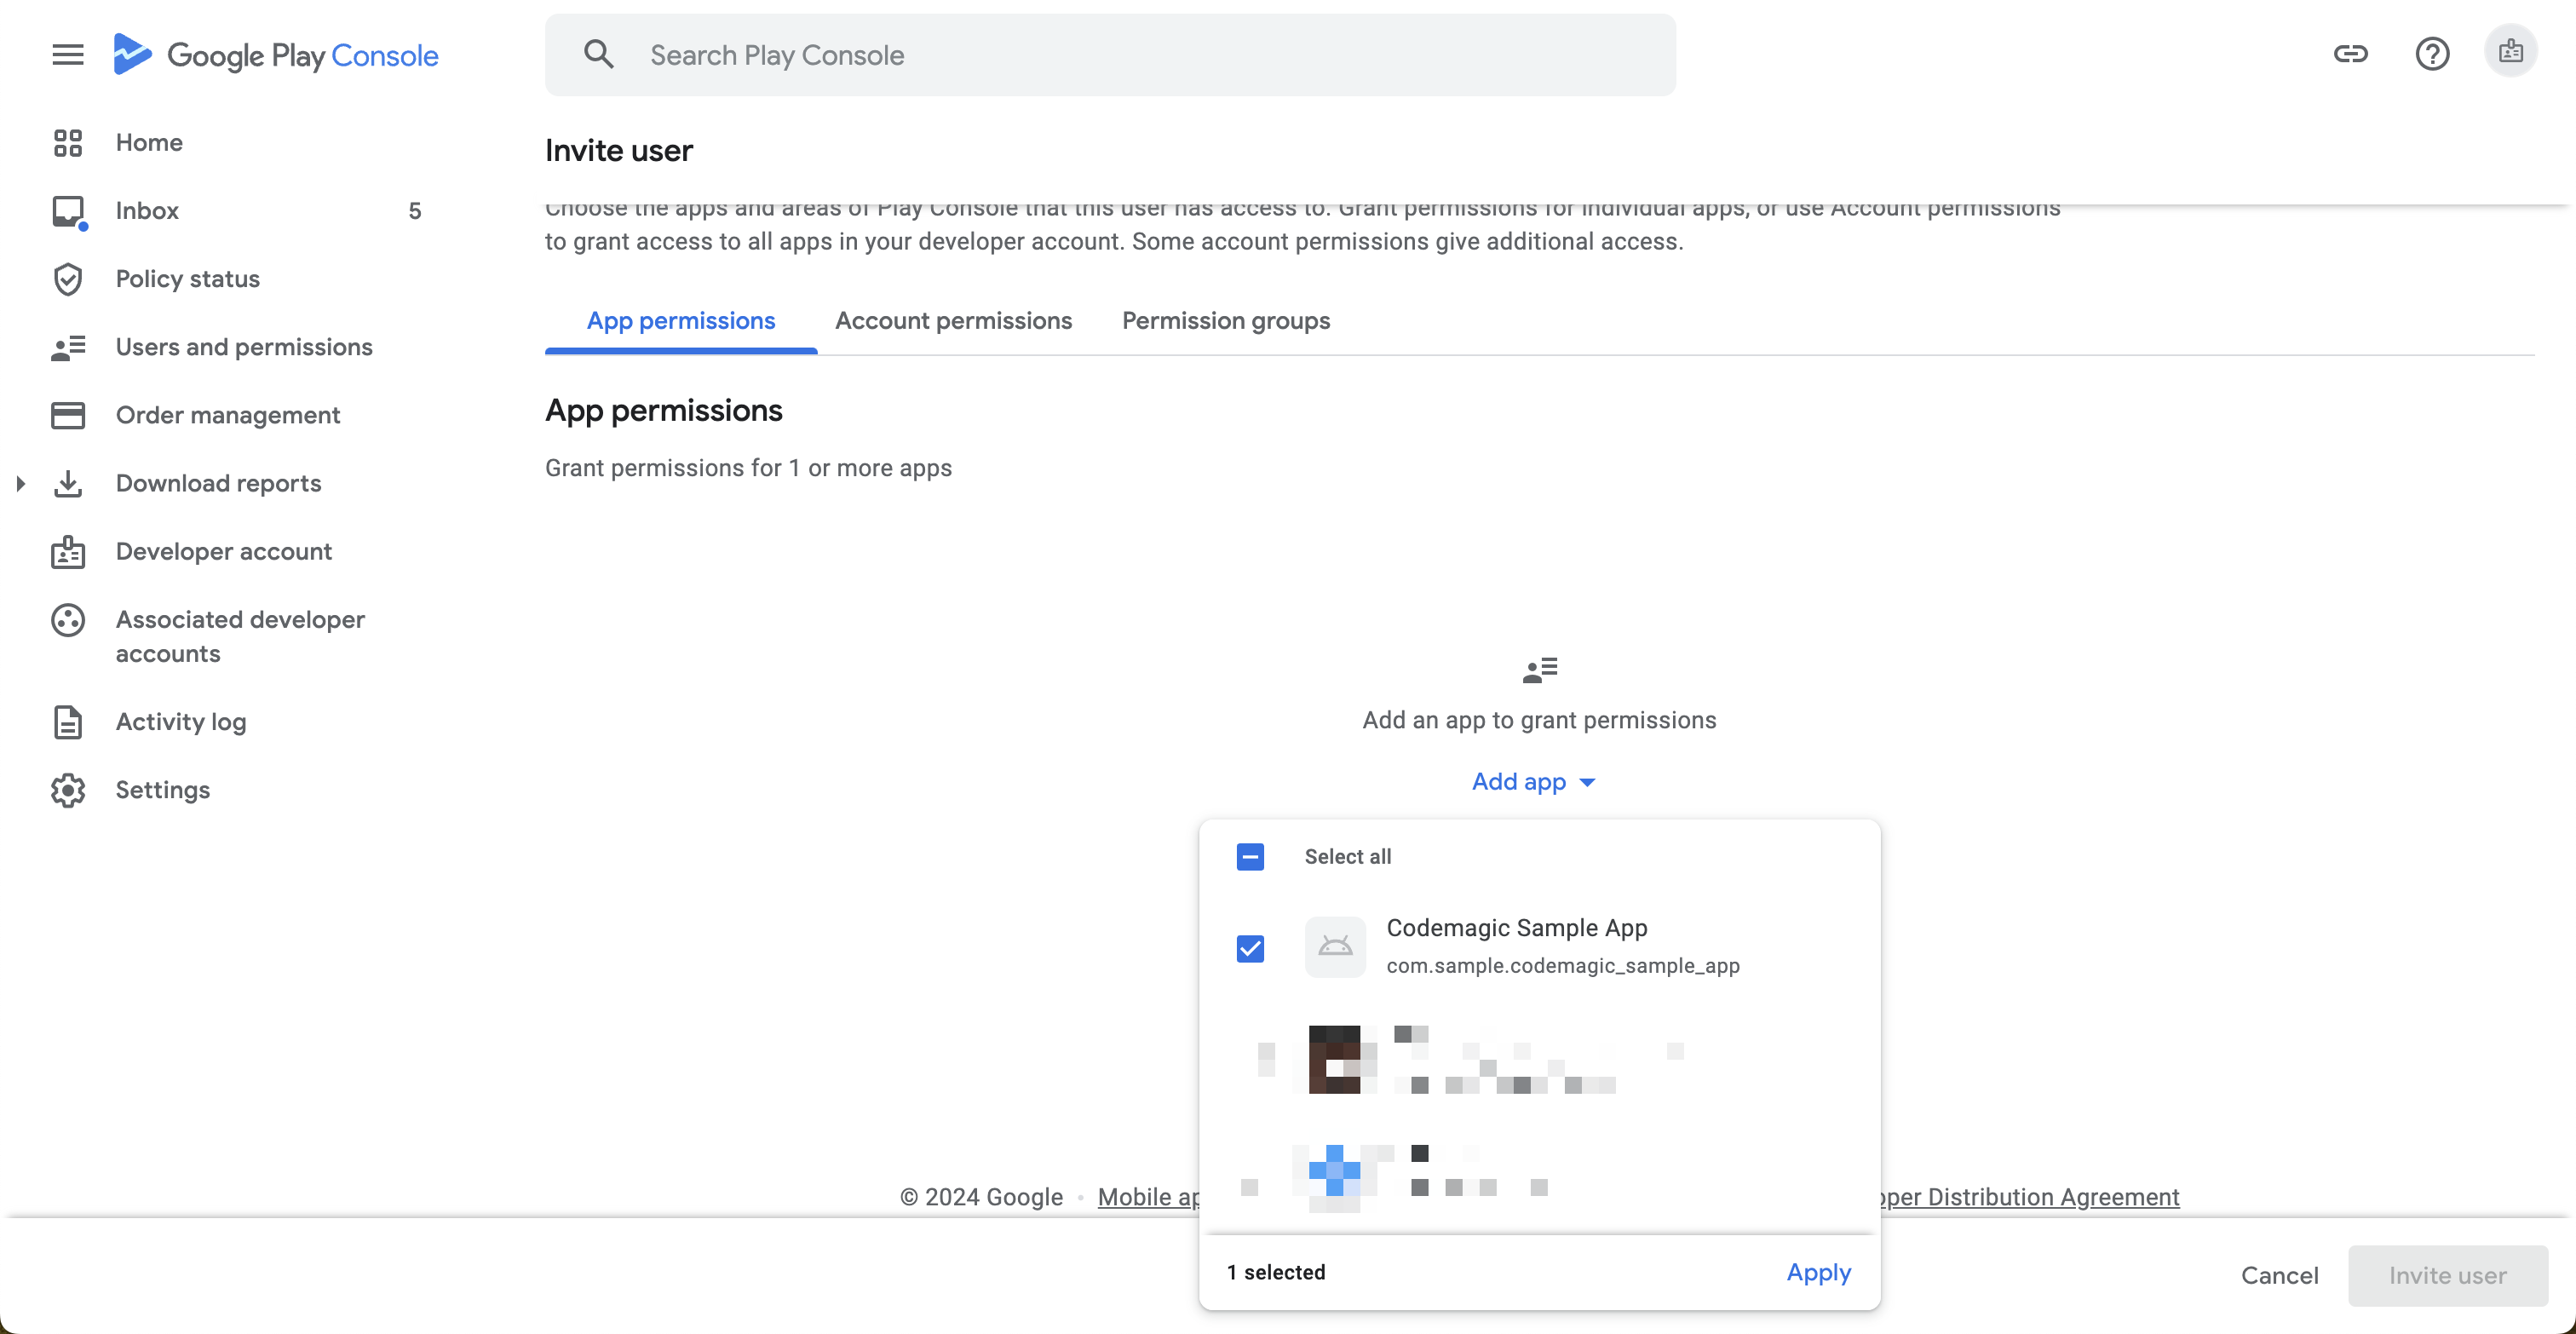
From the Add app, select the target app.
Grant permissions for the Releases section (the rest of the settings can be left as default), and click Apply.
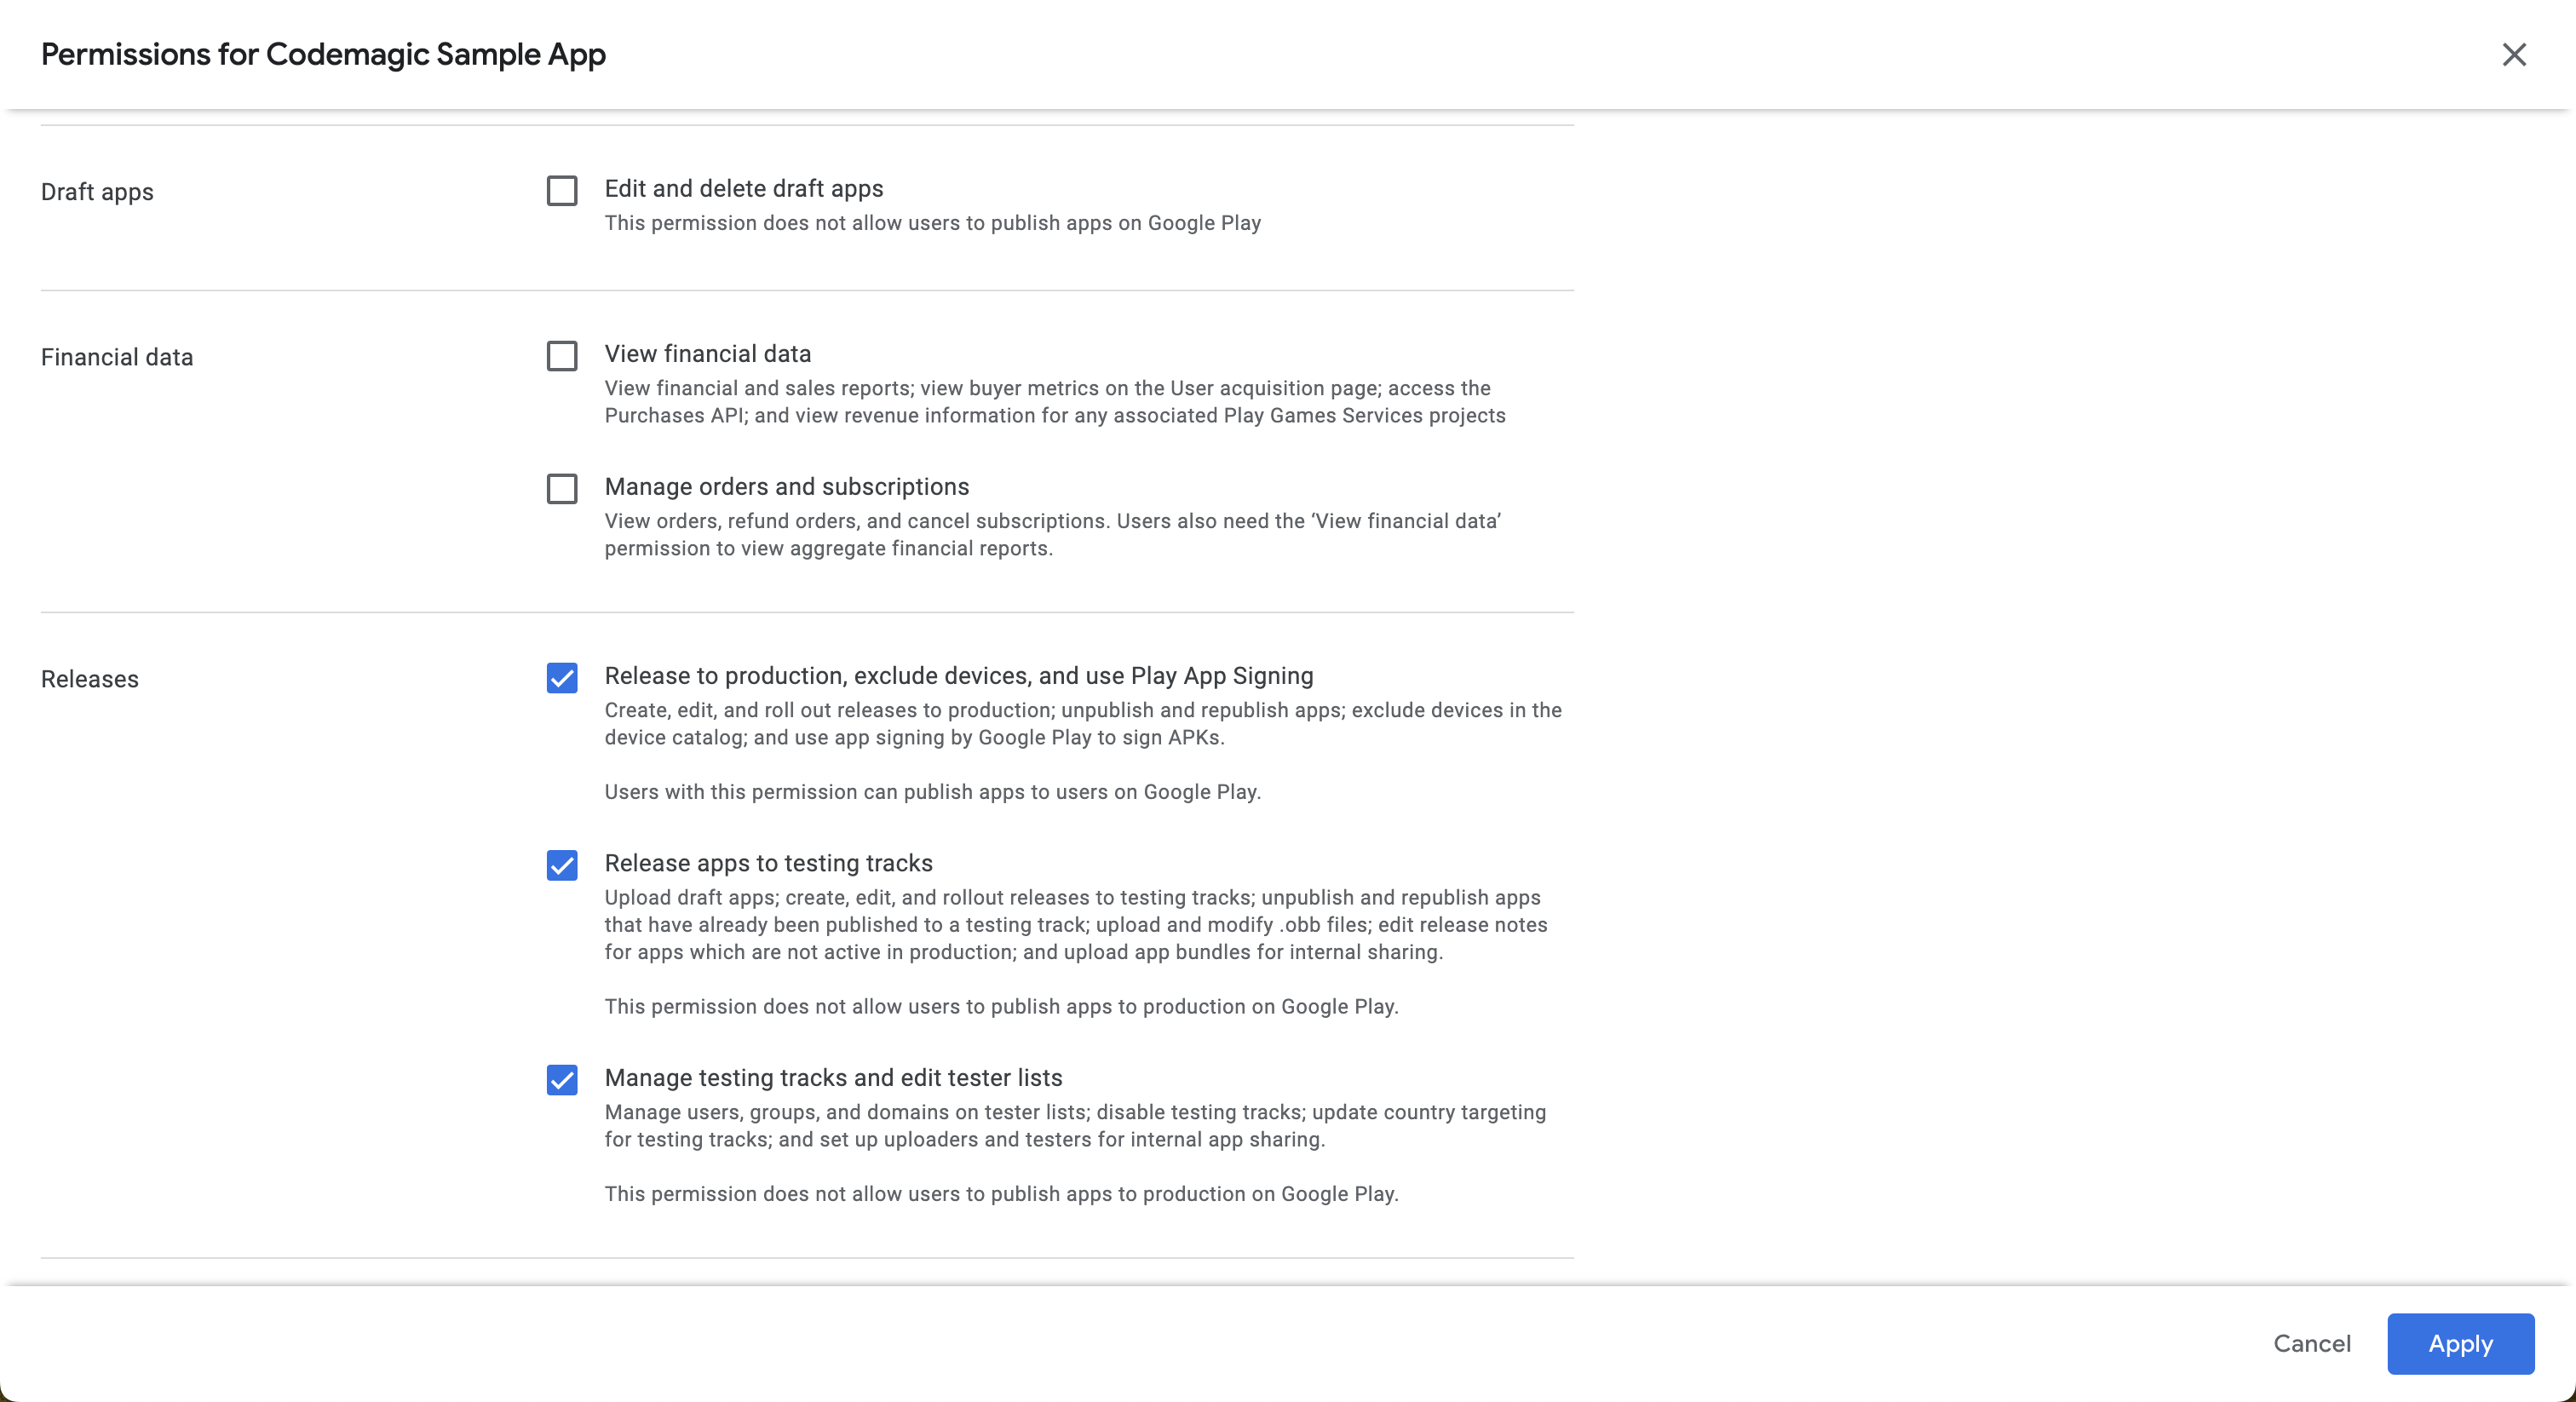
Invite the service account by clicking Invite user.
Setting up publishing to Google Play on Codemagic
Once you make all the preparations as described above and configure publishing to Google Play, Codemagic will automatically distribute the app to Google Play every time you build the workflow.
Navigate to the Distribution section in Workflow editor settings.
Click Google Play to expand the option.
Upload your credentials JSON file.
Select a track for publishing.
- Internal — publish for internal testing and QA
- Alpha — publish for testing with a small group of trusted users
- Beta — publish for testing to a wider set of users
- Production — release the app to production
- Custom — release the app to a custom closed testing track
If you want to publish to a custom track, enter the custom track name.
If your application supports in-app updates, set the desired priority. If not, select Default.
In case you want to release a staged version of your application, which reaches only a fraction of users, set Rollout fraction to a value between 0 and 1. To release to everyone, leave the value empty.
If you are getting the next error:
Changes cannot be sent for review automatically. Please set the query parameter changesNotSentForReview to true, mark the checkbox Do not send changes for review.But if the checkbox is marked and the app is sent for review automatically, you will get the error
Changes are sent for review automatically. The query parameter changesNotSentForReview must not be set.In case you want to upload the artifacts generated in the build to Google Play as a draft release, select Submit release as draft. Note that you cannot set the rollout fraction for draft releases.
If you want to publish the .apk even when one or more tests fail, mark the Publish even if tests fail checkbox.
Select Enable Google Play publishing at the top of the section to enable publishing.